Rogue Panda Blue Ridge Handlebar Harness: Simple & Solid

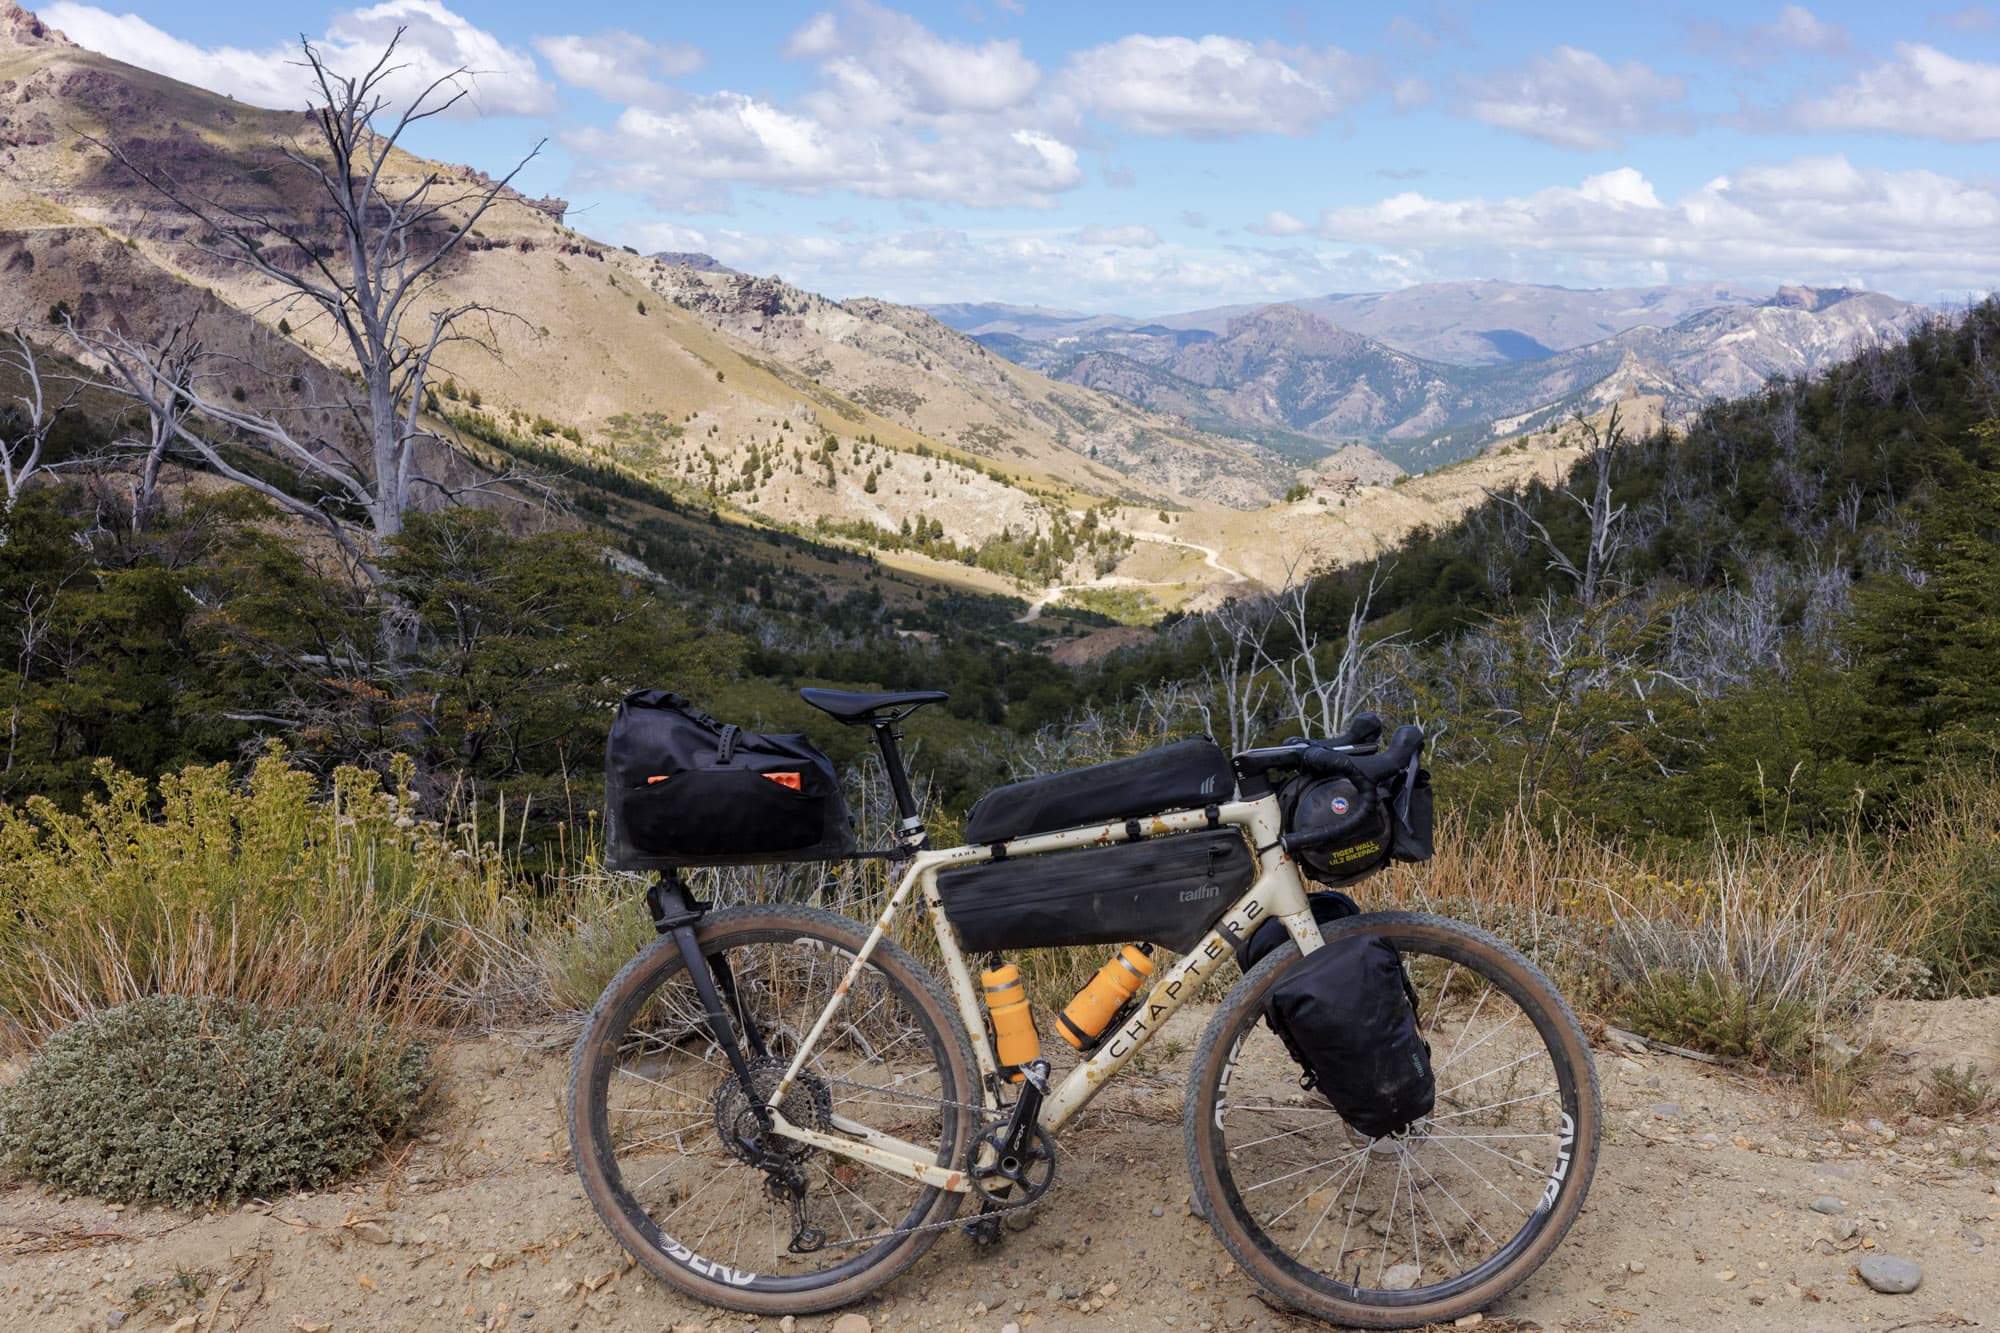
Over the years, I've tried many different bikepacking setups, playing around with racks, bags, straps and backpacks in a search for a balanced, organized and yes, even aesthetically pleasing system.
I began bikepacking with a simple handlebar roll strapped directly to the bars. While this bag got me through my initial adventures, I soon found that this wasn't the optimum setup for me—the bag interfered with my hand position on the bars, and I didn't like stuffing gear into the bag while it was still attached to the bike. From this most basic of setups, I began experimenting with various front racks to get the bag off the bars. Changing to a rack system improved handlebar access and allowed for easy bag removal, improving the packing experience while at camp.
The drawback of a rack system, however, is that not all racks work on all bikes, and as I like heading out on different bikes best suited for the adventure at hand. I didn't have a rack that could work on both my mountain bike front suspension and my gravel bike with carbon forks. A secondary drawback of most racks is simply their added weight to any setup, which may not be a concern for some folks, but something I tend to prioritize.
Enter the Rogue Panda Blue Ridge Handlebar Harness. I saw a buddy using it on their hard-tail, and after hearing his praises, I immediately went about trying to find one for myself. I was eager to see if it was the solution for me.

Discovering Rogue Panda
Living in Australia, I hadn't come across Rogue Panda before, but after a quick Google search, I could see that their story was very familiar—one that resonated with me. What started as a “Make Your Own Gear” phase, the brand developed and quickly increased in size. Rogue Panda is based in Flagstaff, Arizona, with dirtbag routes surrounding the famed Arizona Trail. I like that the brand embraces the fun, not-so-serious side of bikepacking, with many of their bags featuring wacky and colourful designs.
What spoke to me most was that their products are designed for rambunctious singletrack riding. Embracing strength, durability and rock-solid attachments to keep gear from bouncing around on bumpy terrain. The number of bags and bag makers has exploded in recent years, making the choice for bikepackers around the world even more difficult. It's rare to find a company that's doing things a bit differently, and this is how Rogue Panda appears to me. Rolling to a different beat. Besides the Blue Ridge Handlebar Harness that I've been using, you can see innovative design in their Ripsey Seat Bag V2, Bamboo Shoot bar-inners and Huachuca hip-pack.
From Box to Bike in Minutes
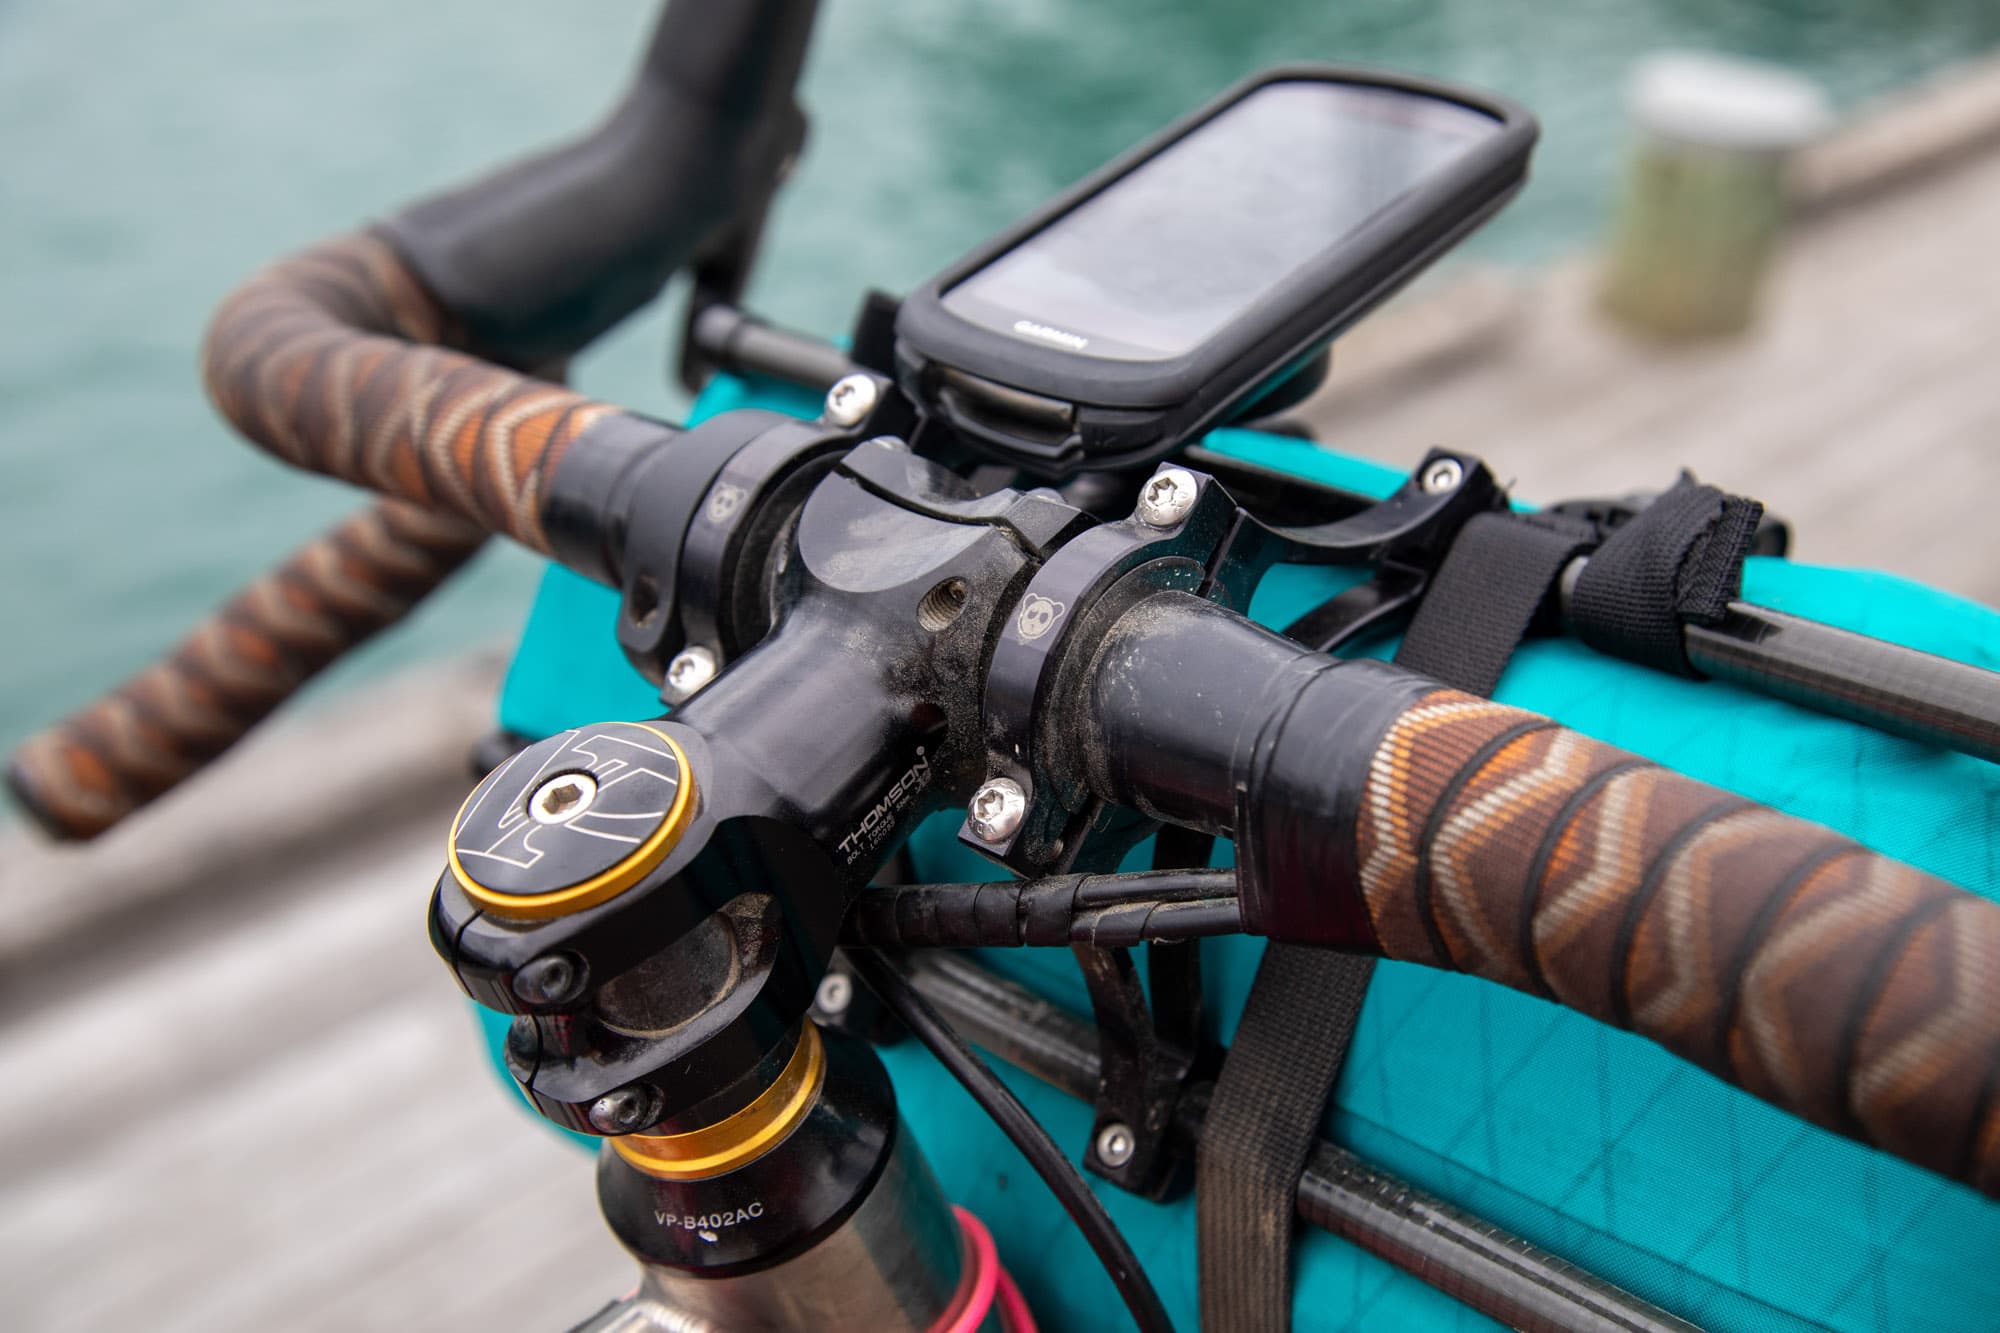
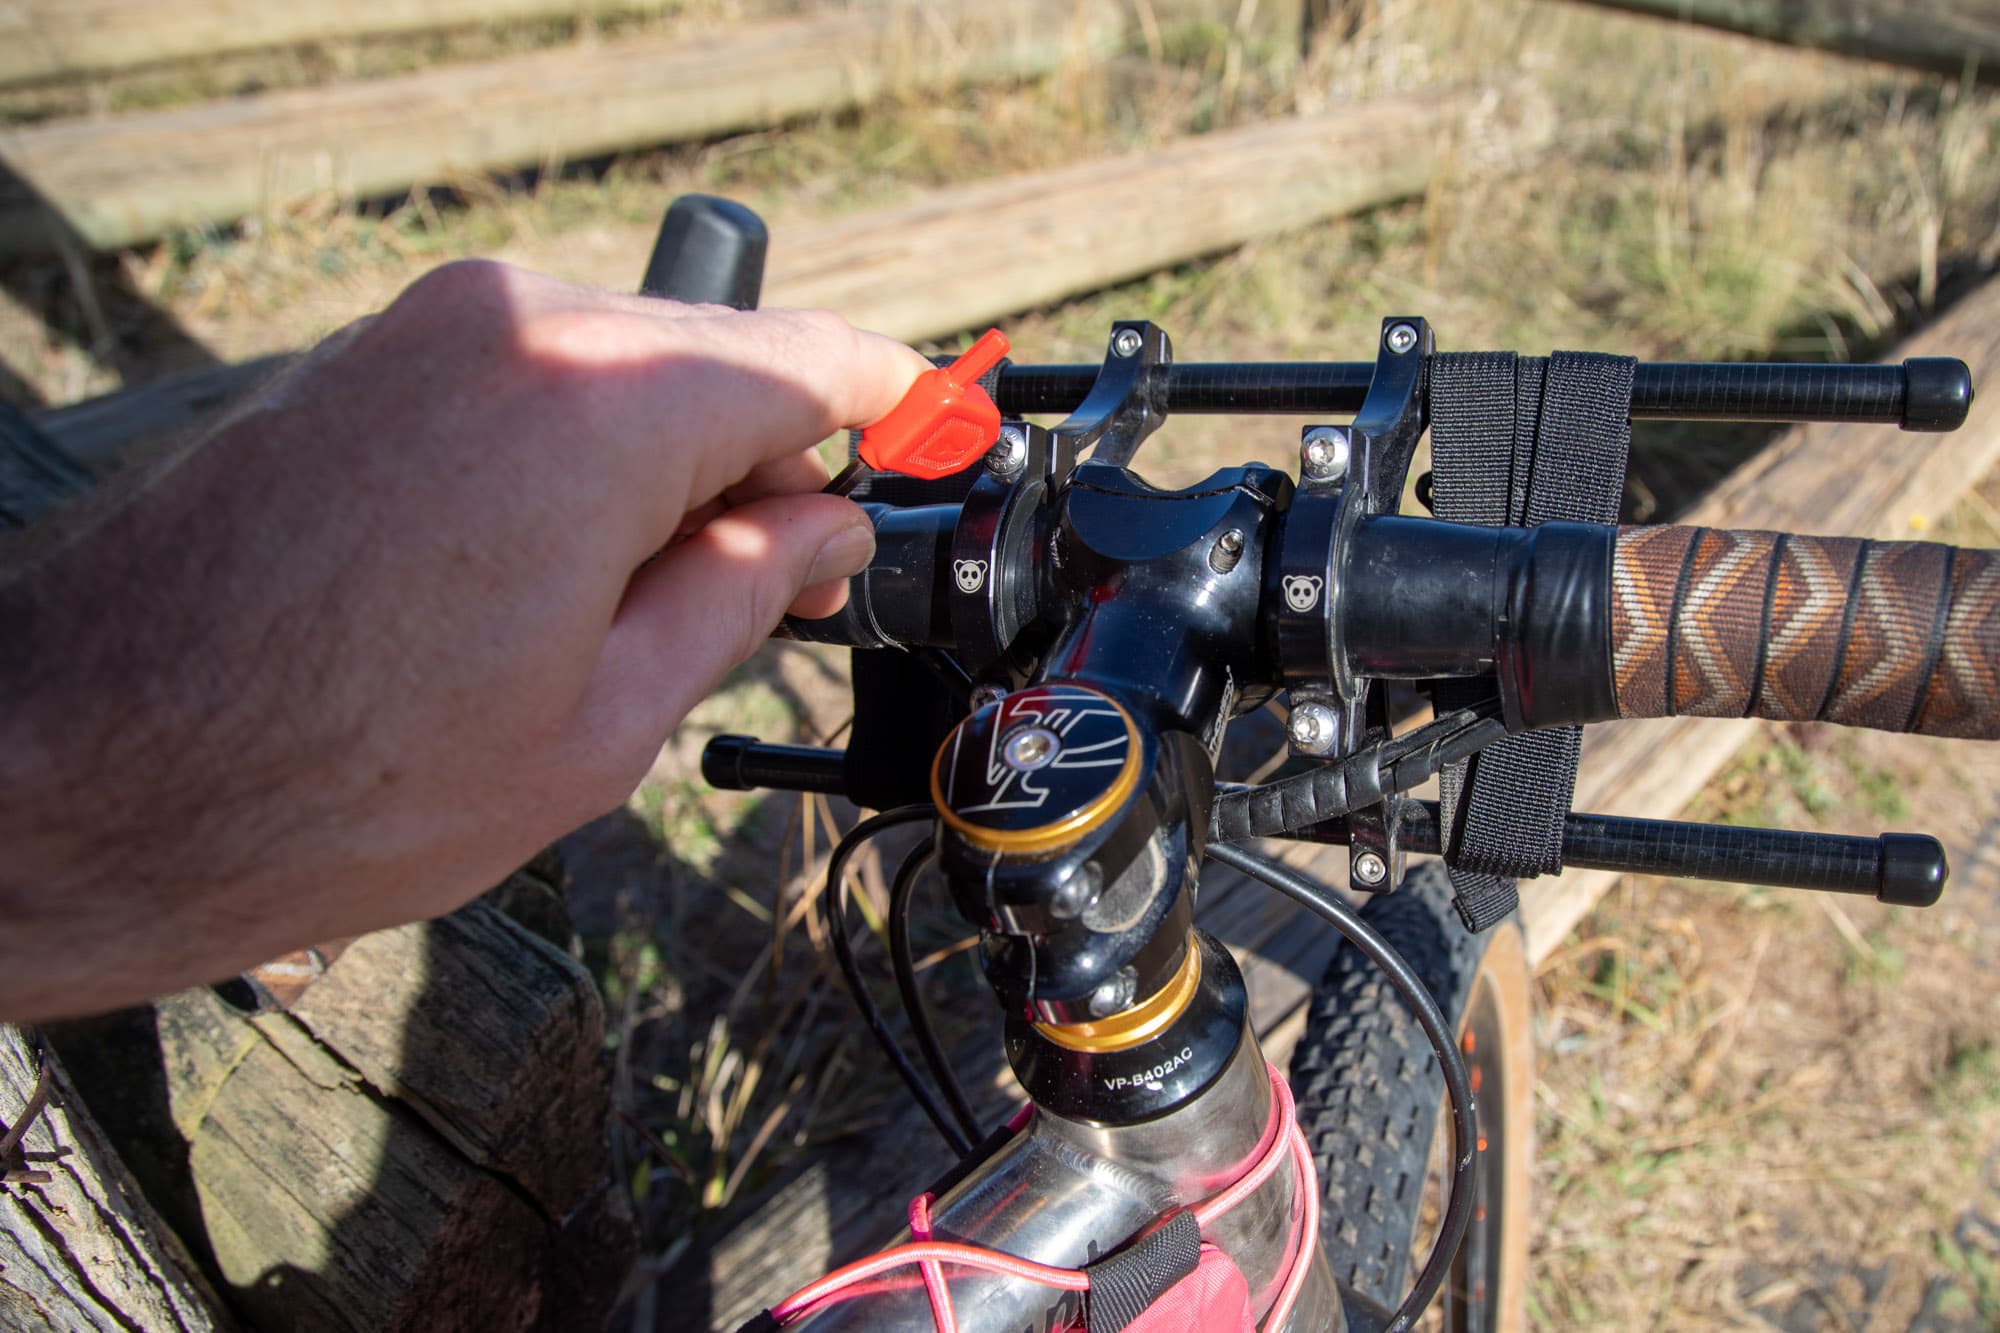
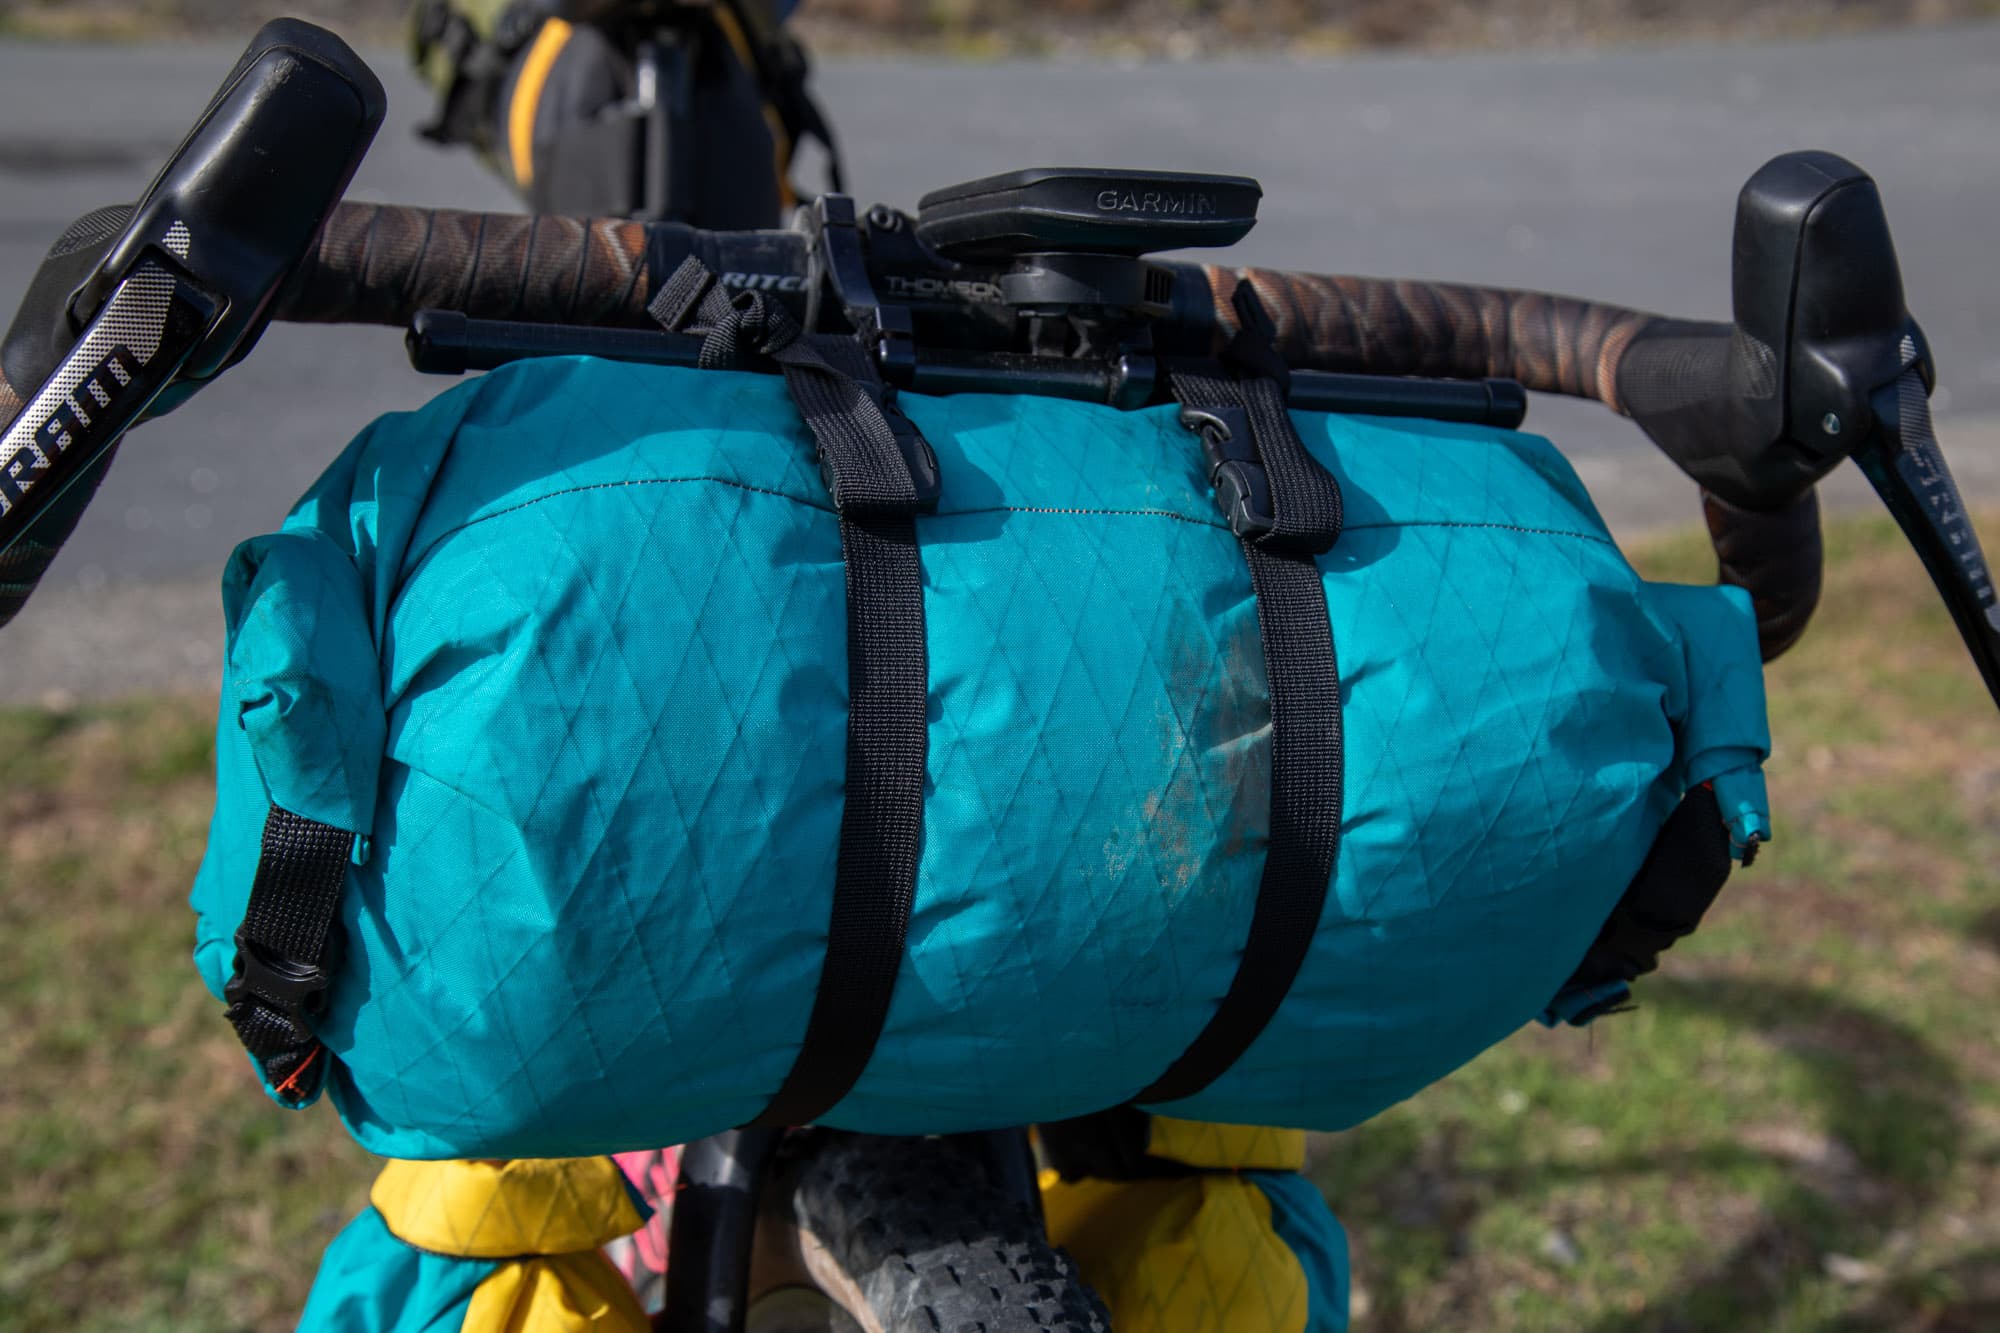
The Blue Ridge Handlebar Harness arrived simply packaged in a cardboard box—no hype, no waste. The design makes it incredibly clear how the harness attaches to your bike. There are very few moving parts. Most of your installation decision-making is made when purchasing the harness, as you need to decide what size shims are required to fit your bars. The kit comes with 31.8mm and 35mm shims, but you'll need to get 22.2mm shims separately if you require them.
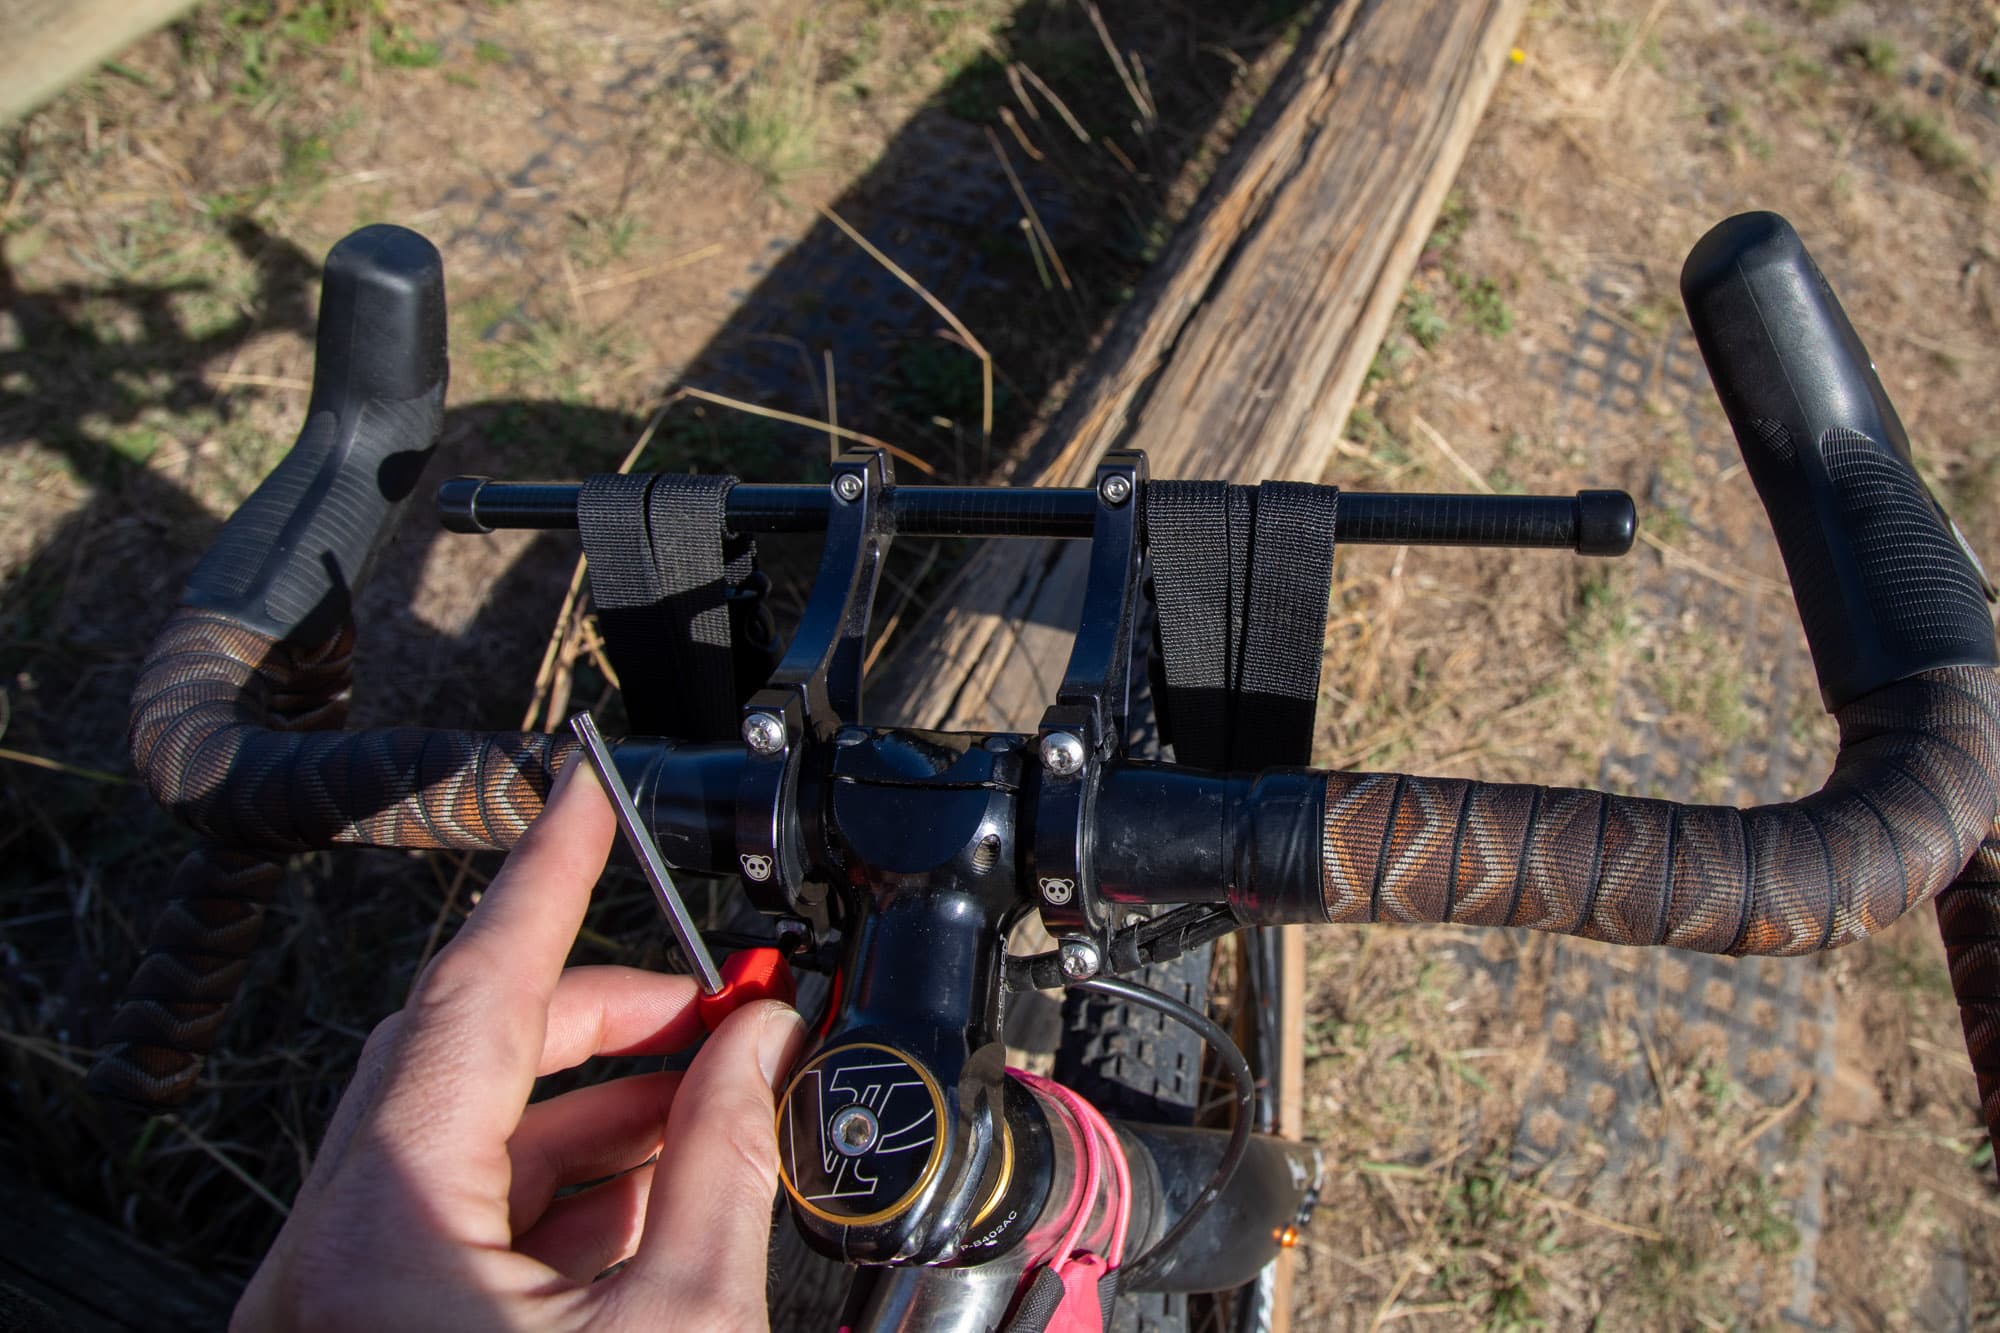
The mounting system simply bolts to your handlebars. After removing the four bolts from the aluminum clamp, ensure the correct shim size is attached (labelled for your convenience). Hold the main body of the harness to your bars, taking care to ensure your brake and/or shifting cables are tucked out of the way. Hold the clamps in line with the harness and screw in bolts to finger tight.
From this point, you can tilt the harness mount to your desired angle before using a wrench to tighten. I have plenty of room between my handlebars and front wheel, so I tilt the harness mount down a little to maintain the cleanest lines while keeping the harness and dry bag off the head tube and away from my cables. If you're mounting this on a drop bar bike, Rogue Panda's got you covered with their clever Drop Bar Cable Shims. Upon reflection, I wish I had ordered these because when mounting the system on my gravel bike, I have to push the cables under the clamps to fit. This is what the cable shims were specifically made for. Had I been thinking, these would have alleviated this issue by providing the space between the clamp and bar, keeping the original routing running smoothly.
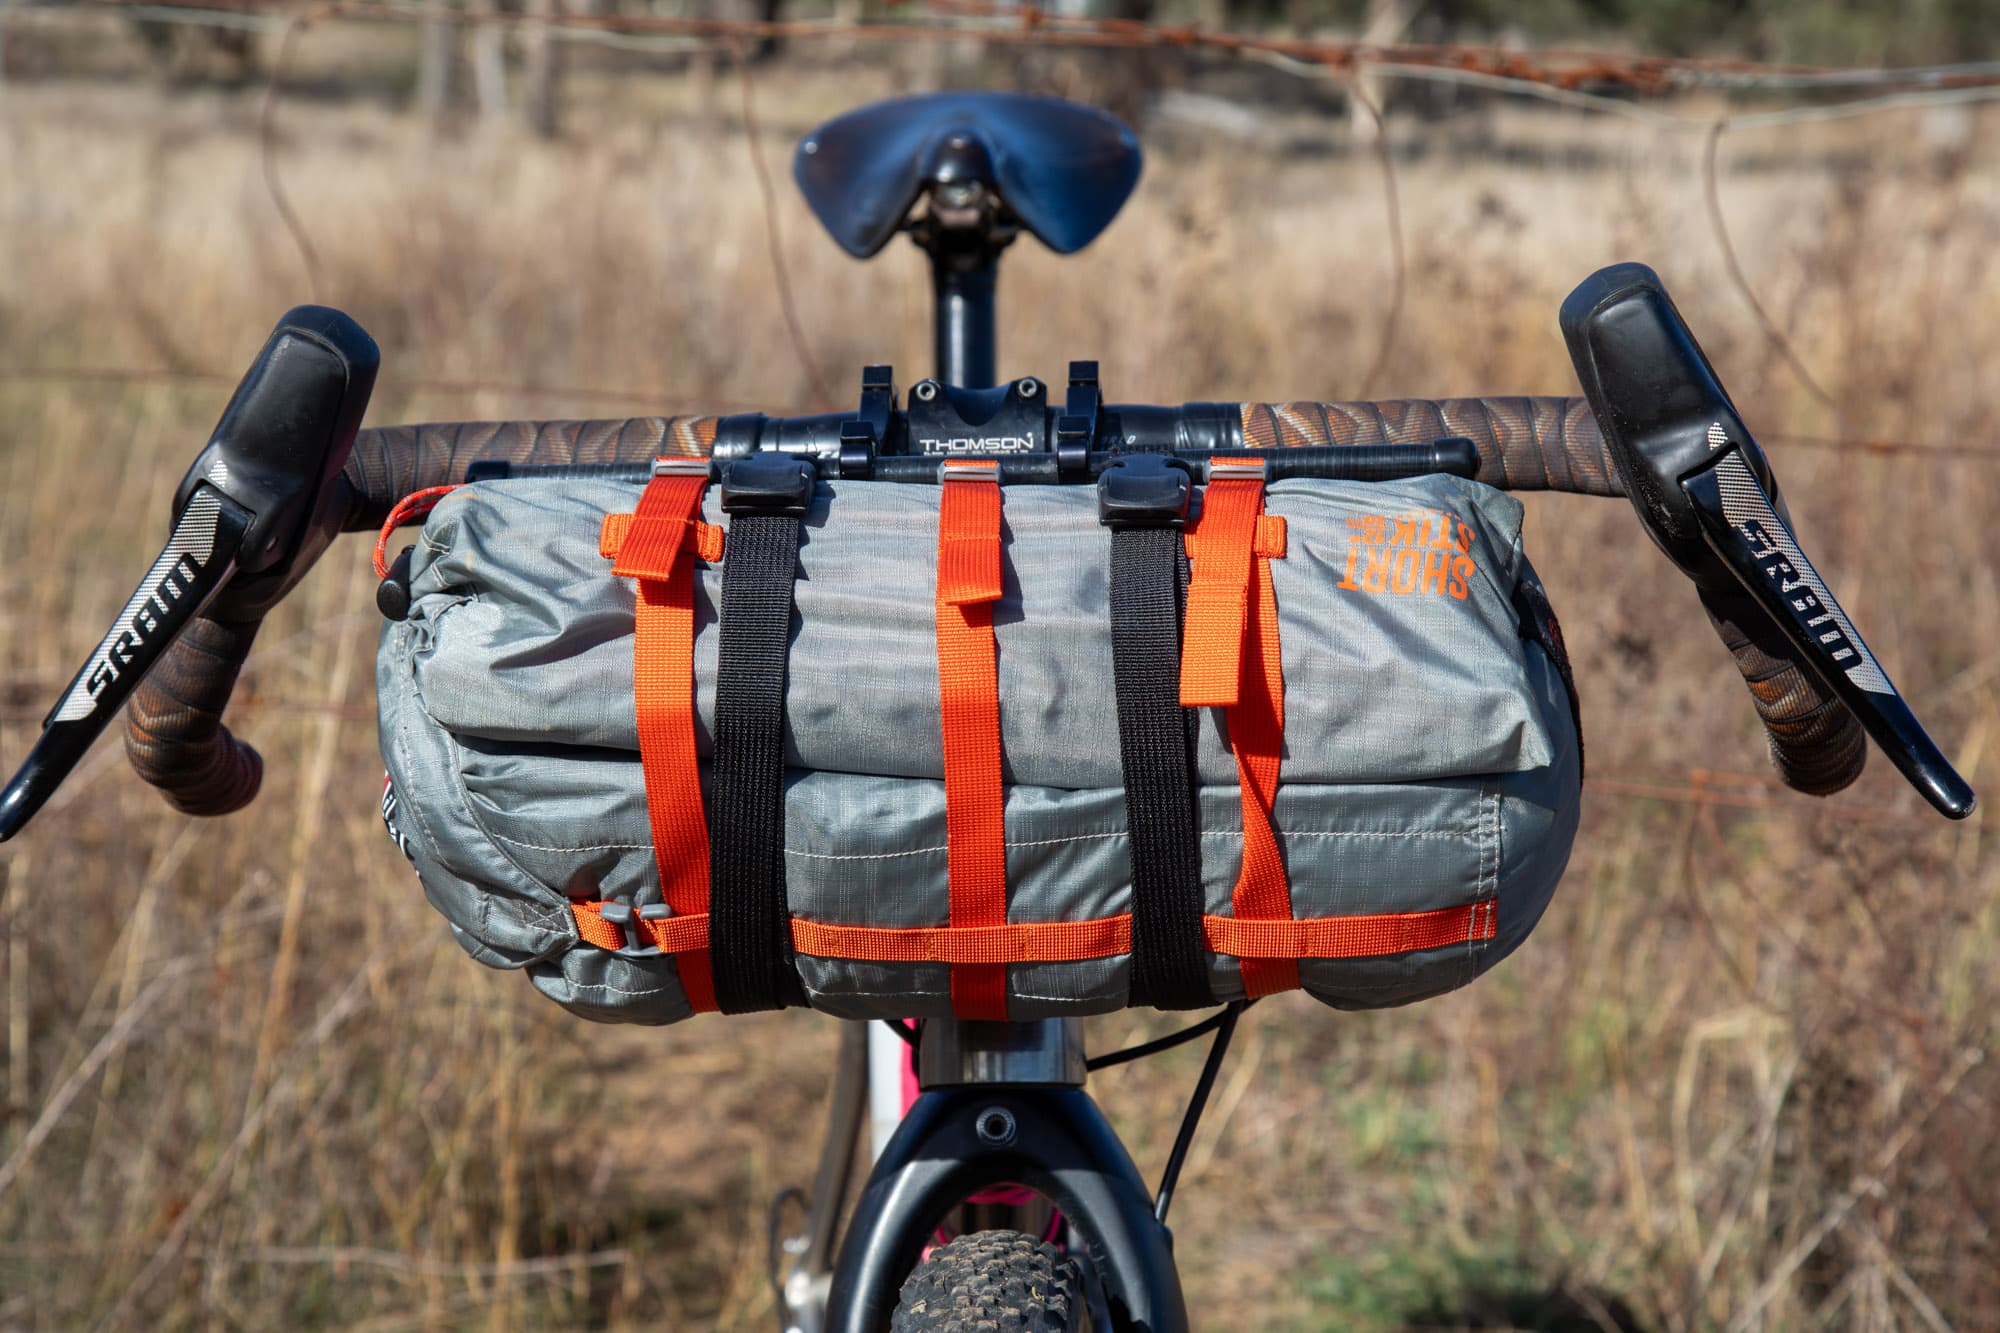
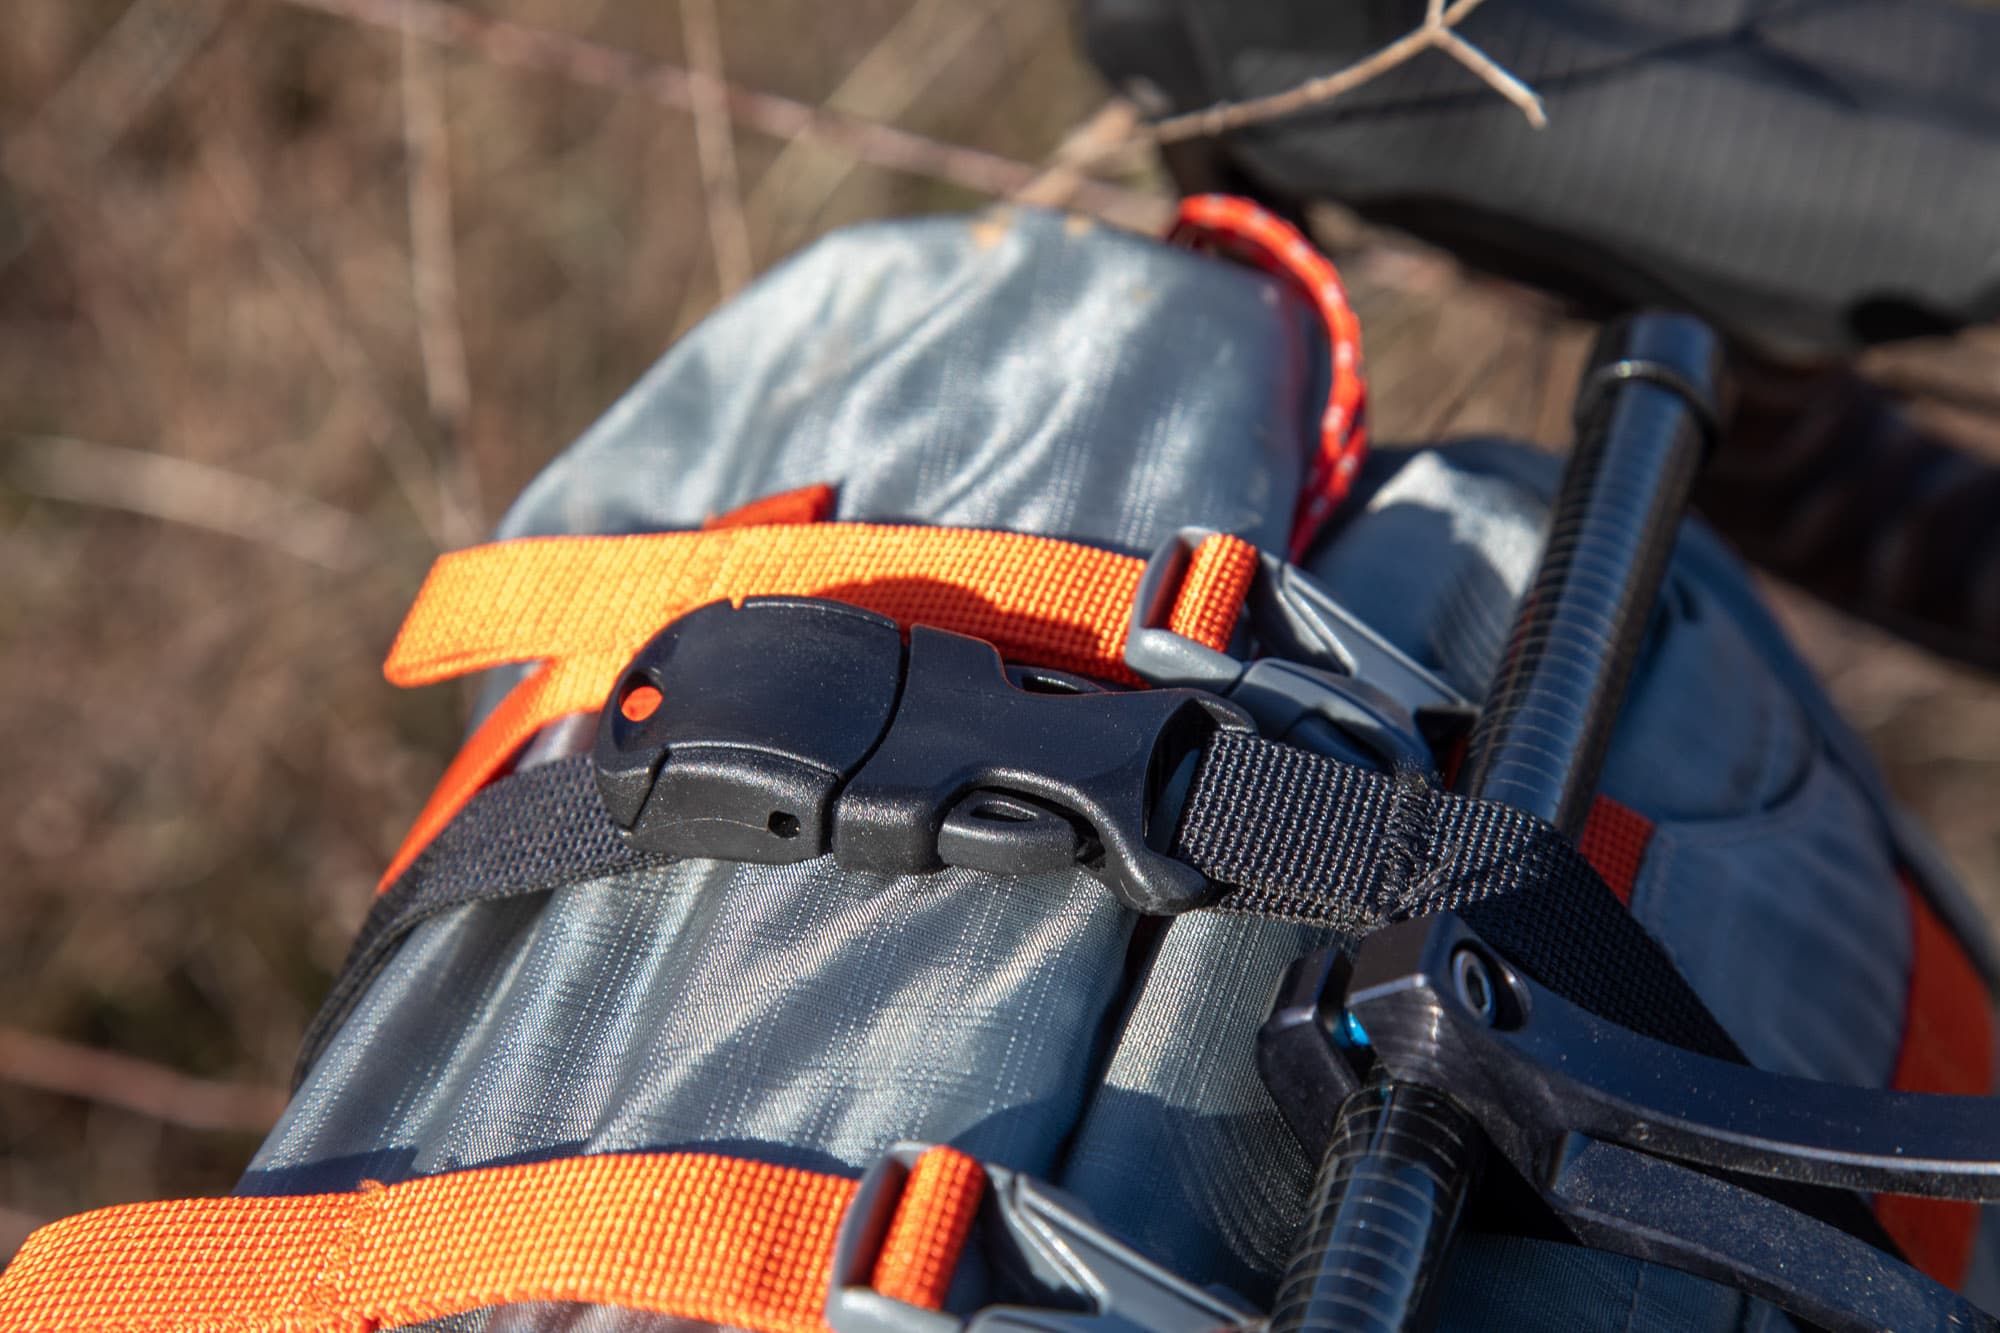
Once the harness system is attached, it's incredibly quick to secure any dry bag of your choosing by simply unclipping the buckles, reattaching around the dry bag, cinching tight and locking the straps down—done. The straps are more than long enough to secure large bags or items; however, with small items, there's no loose strap holster included, so you'll need to tie it off or tuck in the excess.
Lightweight, Clever, and Built to Last
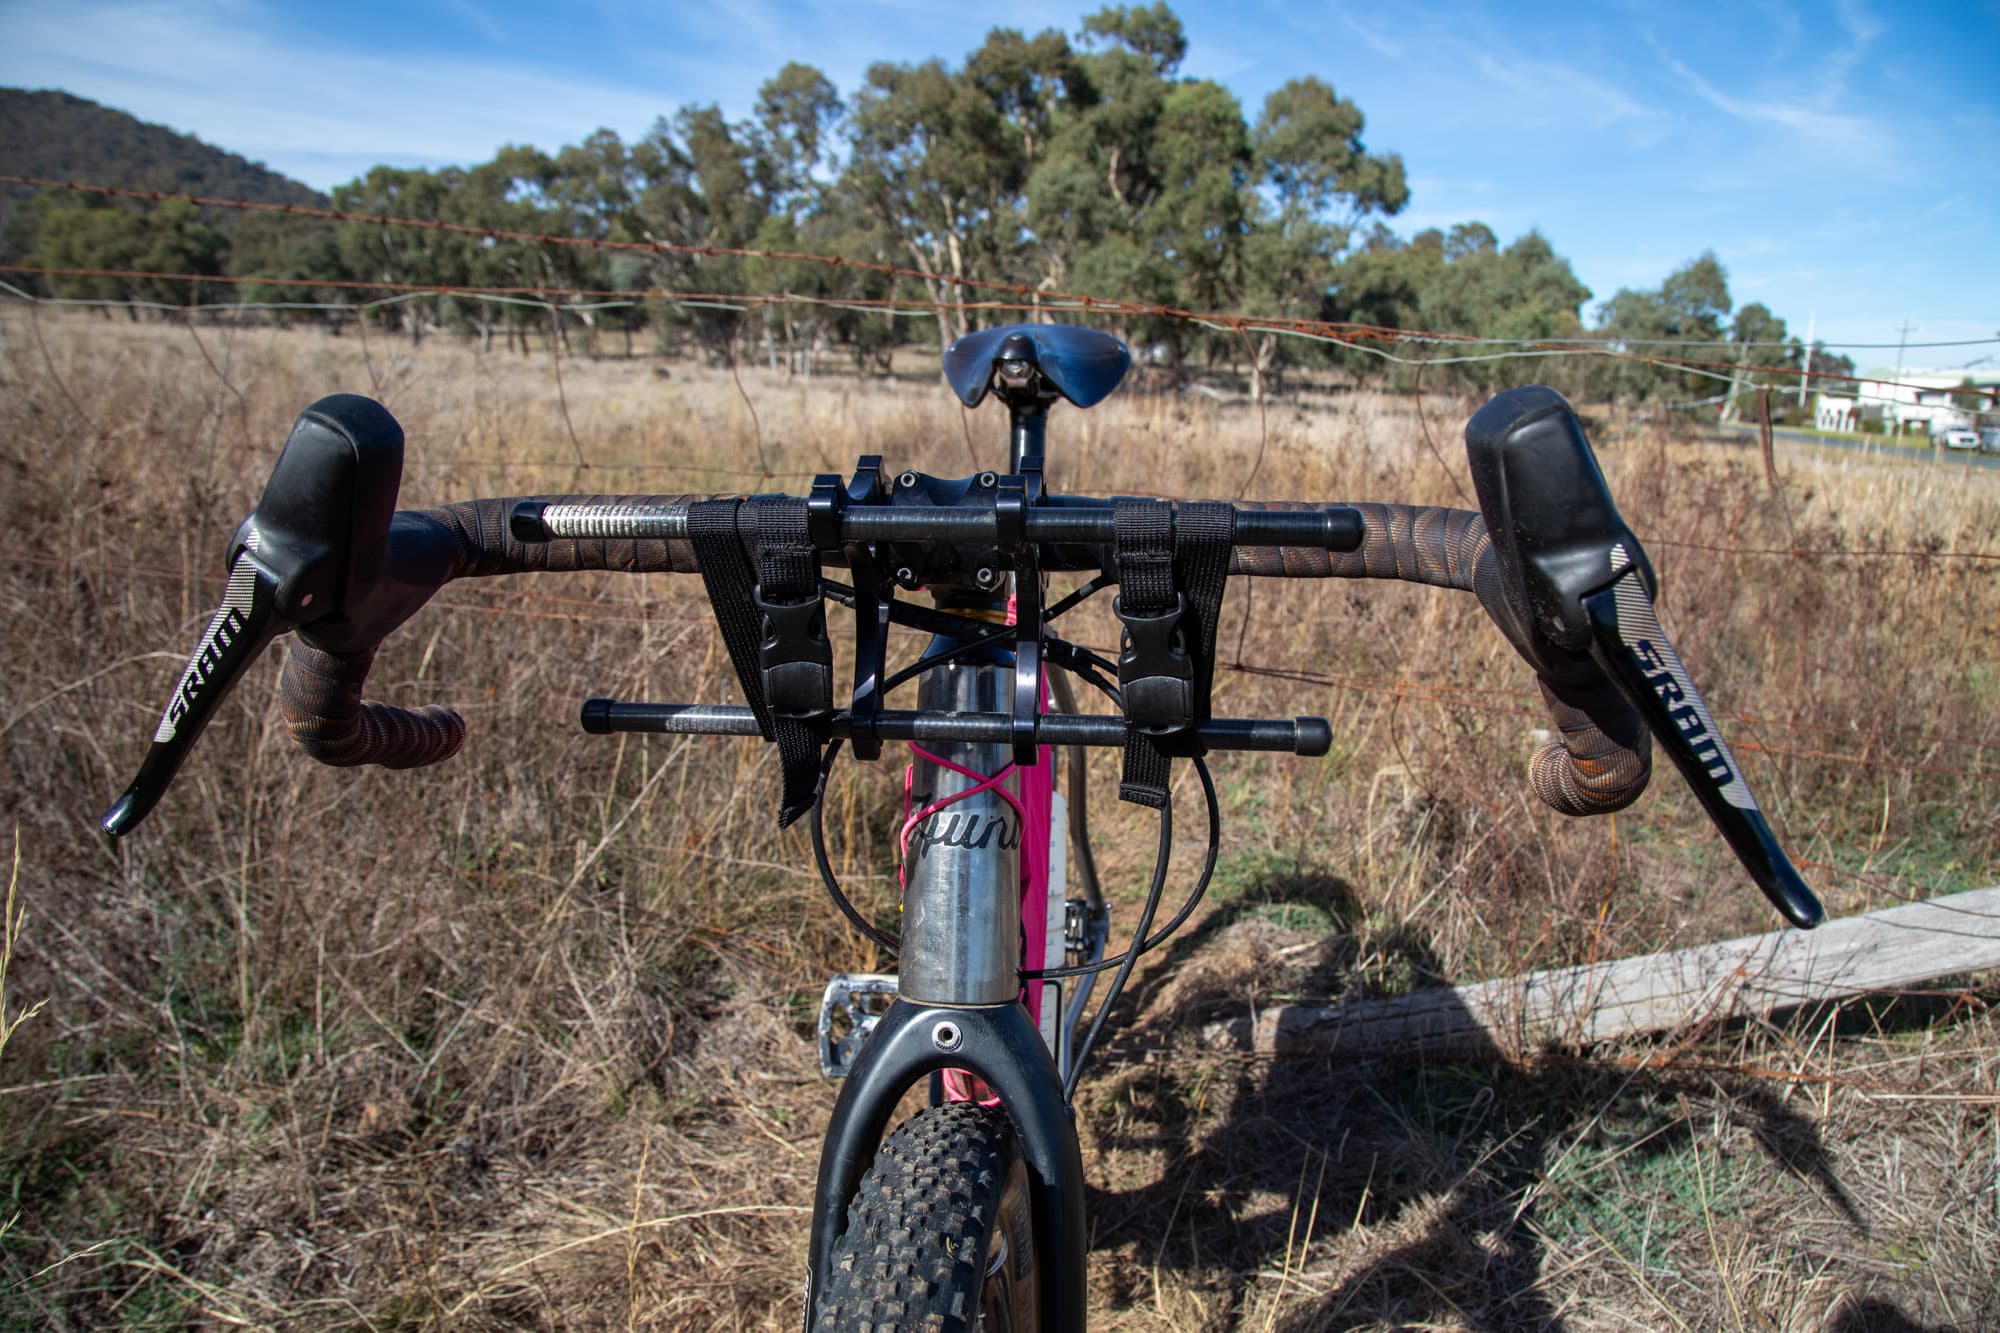
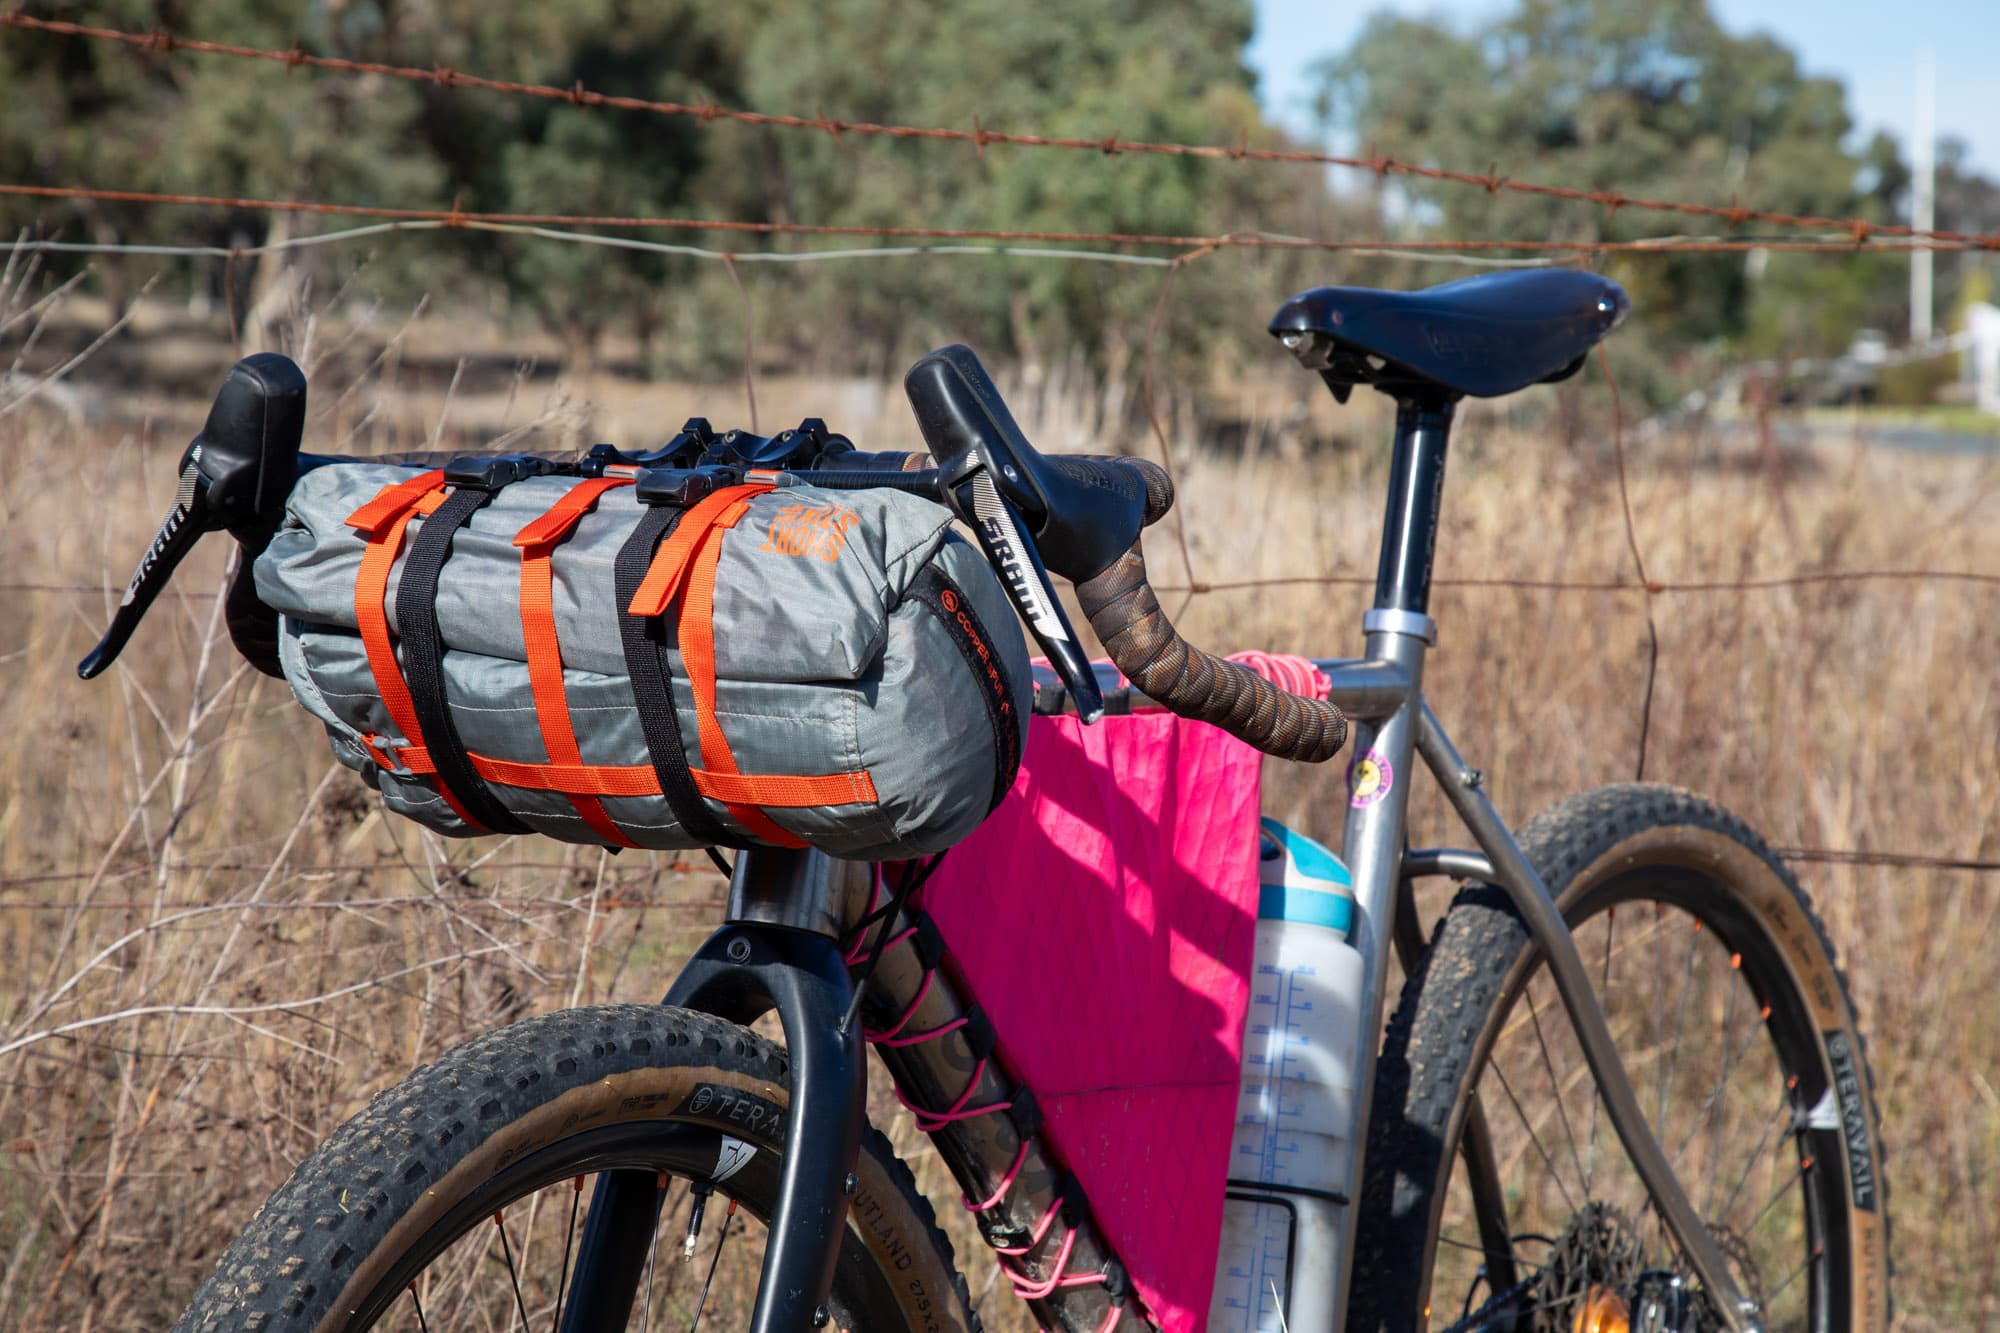
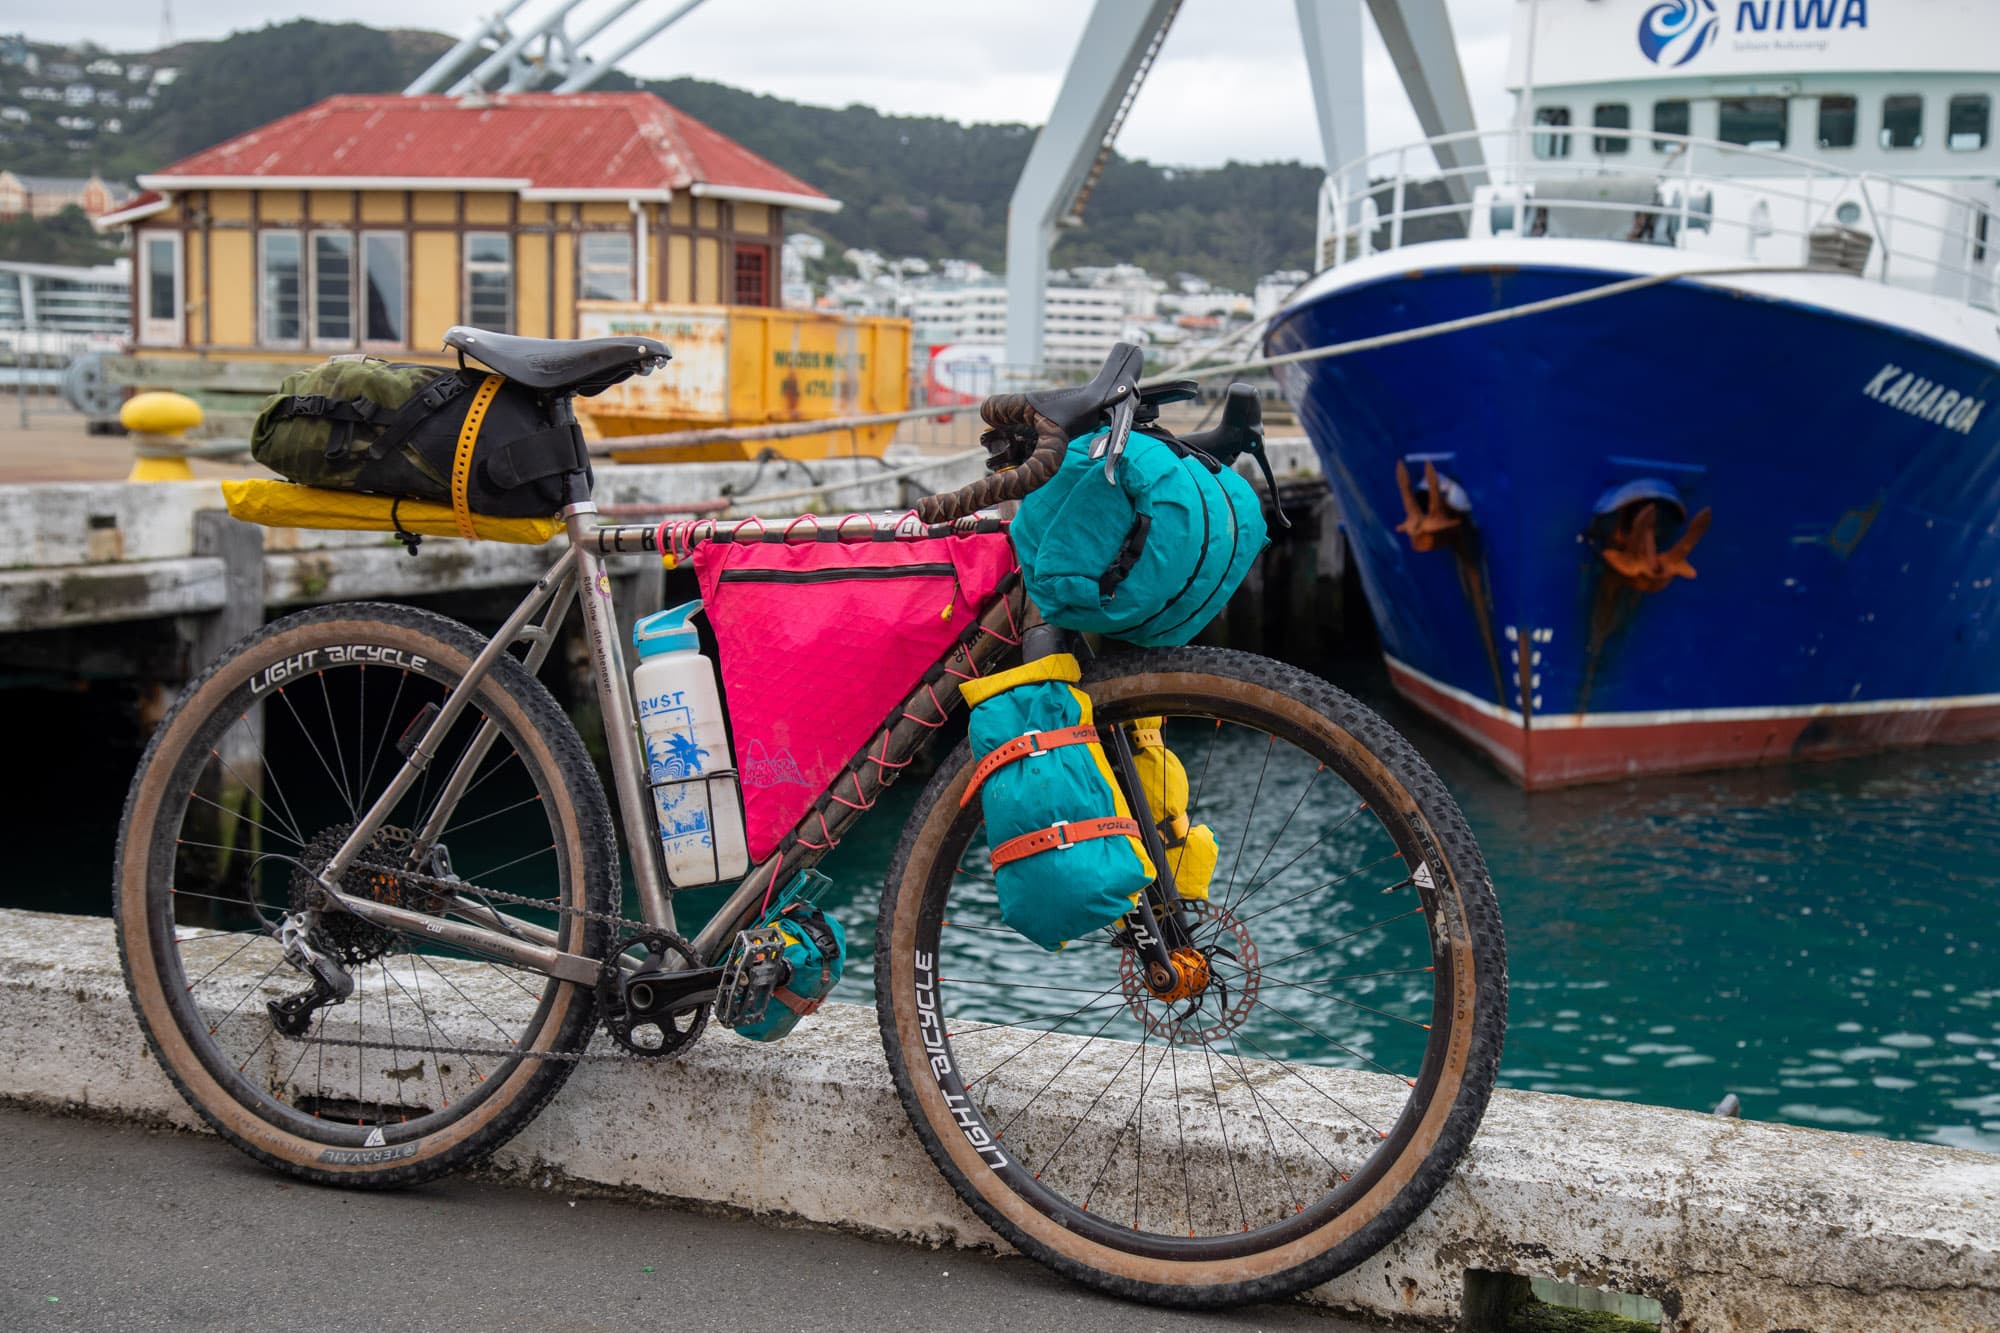
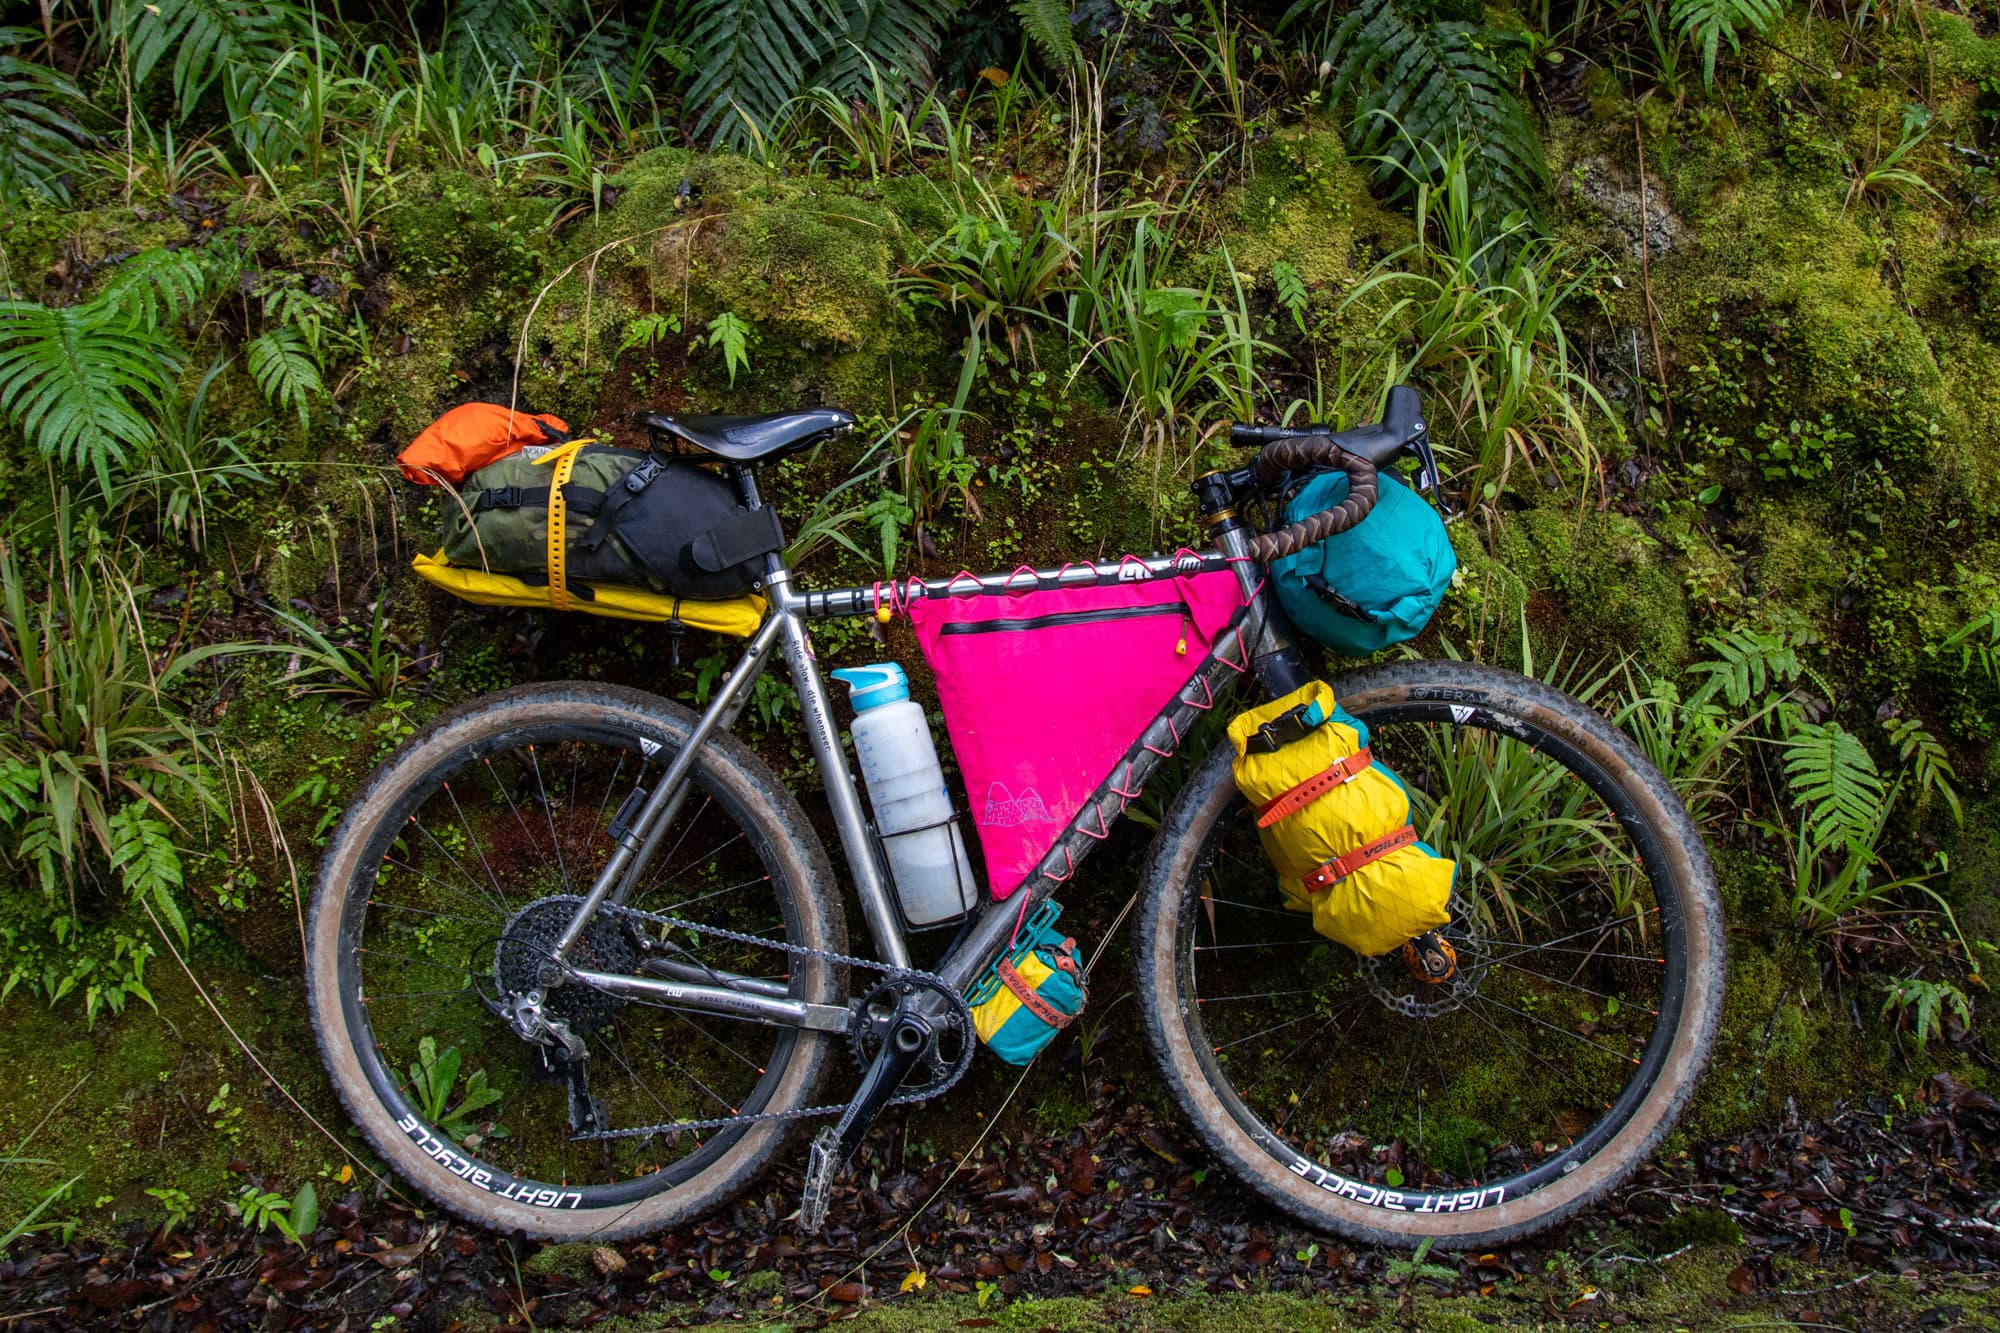
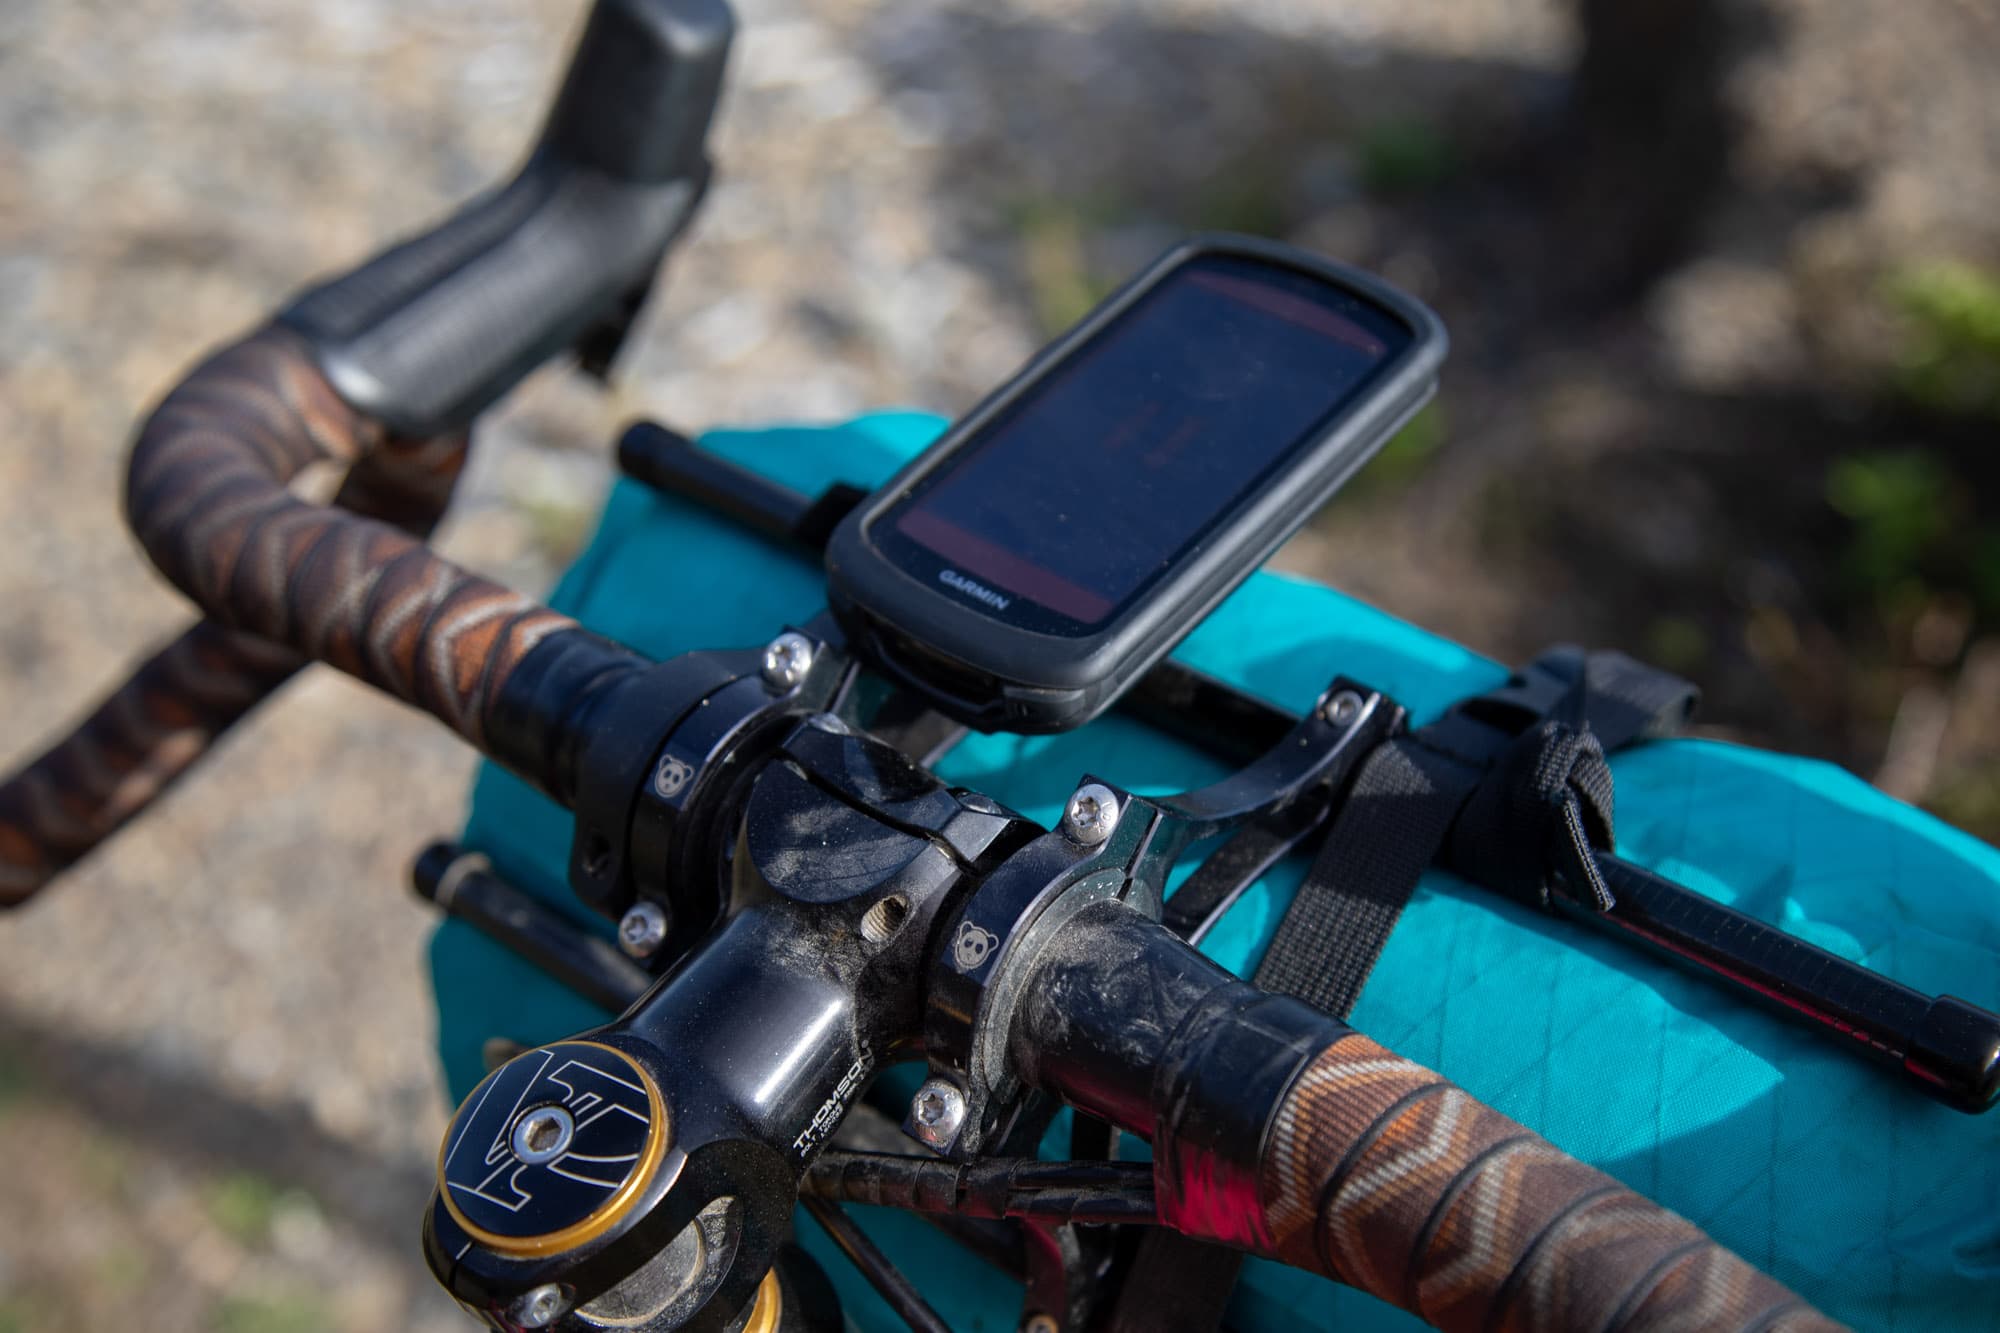
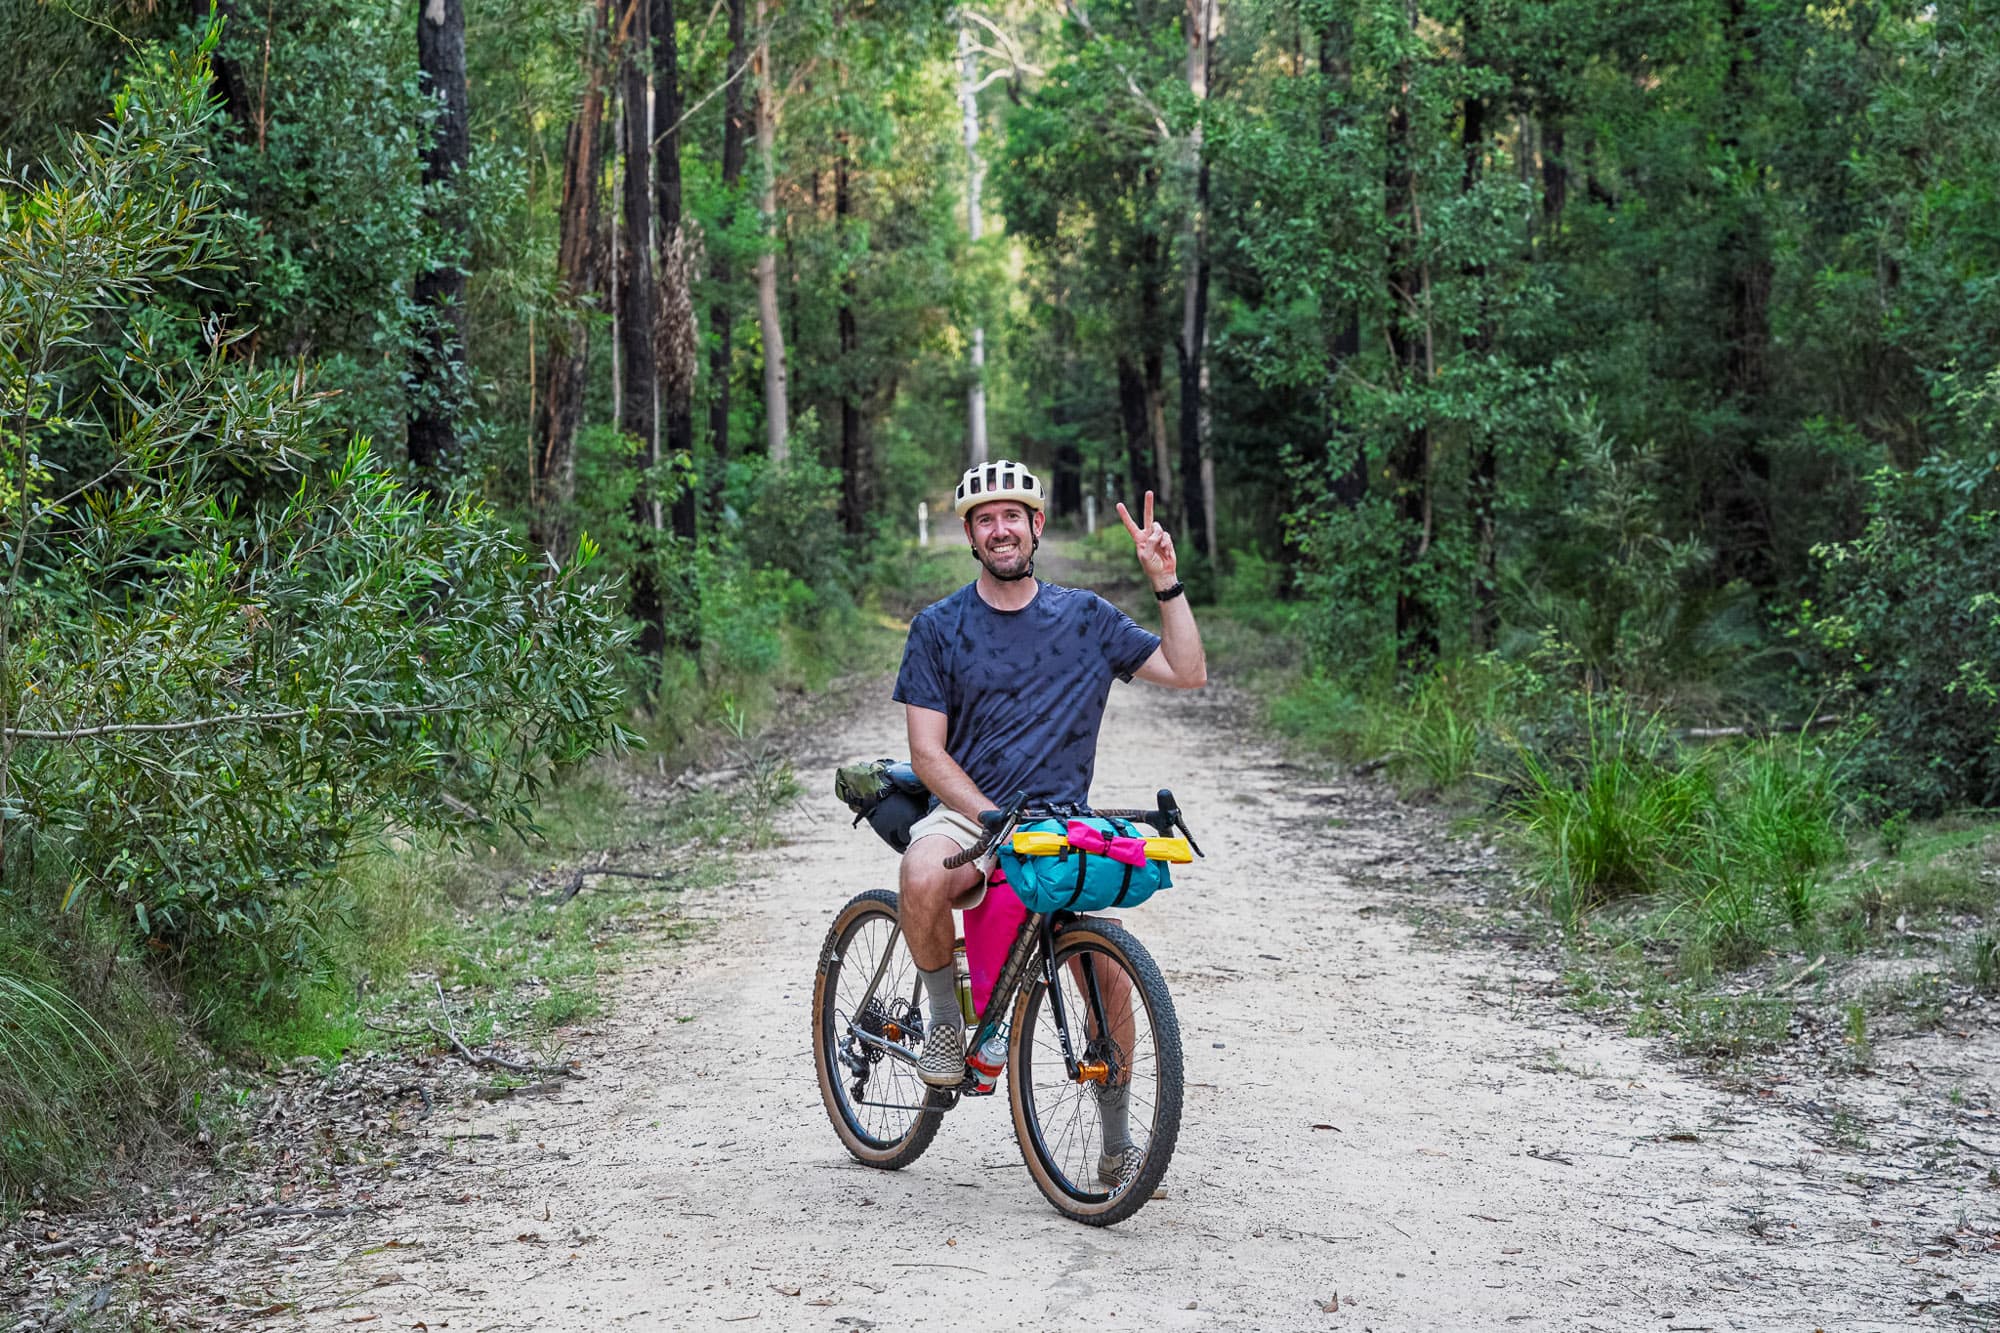
While I knew how light the Blue Ridge Harness was reported to be, however, when the parcel arrived, I thought they had mistakenly sent me an empty box. Weighing only 240g, this rack definitely appeals to the weight-weenie tendencies I frequently embrace. The CNC-machined aluminum clamps scream precision quality, and the design is beautifully clean and crisp. There's a cute little Panda face on each clamp—a subtle nod to the brand—otherwise the harness is pure, sleek matte black machined bit of goodness. There's no head tube attachment, which maintains the slick lines and keeps the cockpit area uncluttered. The clamps are reasonably narrow, allowing for extra space. I found had room for my Garmin and light mount without needing to buy the additional Blue Ridge Accessory Bar.
The two simple carbon fibre poles provide a straightforward, light, clean aesthetic with rubber end caps installed. The poles measure about 31cm, which neatly fits between my drop bars, and roughly the same length as a small tent bag. They are the perfect size for my Big Agnes Copper Spur HV UL2. The carrying capacity is rated to 3kg, which is likely to be well above the weight of a tent and some additional gear. At $200 USD the price can be a bit steep for some, however, once you see the craftsmanship and experience the clever design while out riding, it's worth every penny.

Cinch & Send
I've used the word 'simple' a few times while describing the Blue Ridge Handlebar Harness, its design, installation and now I'll use the same to describe its real-world use— purely simple.
With the system attached to my bike, I grabbed a tent off the gear shelf, strapped it to the rack, cinched it tight, and off I went. This ease of use instantly appealed to me. Because of the simple installation, I found it going on & off the bike with regular abandon. I once timed myself attaching the rack to compare it to my Jack the Rack set up, another straightforward mounting system. I suspected both would be pretty quick, and while Jack edged out for the win by 30 seconds, both racks can be attached to your bike in under two minutes—pretty damn fast. I reckon I could break the one-minute mark if I went for it.
While I preferred to remove and re-attach the rack between uses, its slimline and ultralightweight design means you would hardly notice it if you decided to leave it on, especially as the straps wrap around the poles neatly when not employed. With a bag attached, however, the harness quietly and efficiently does its job, leaving you with plenty of room to grip the handlebars without any interference. When using the hoods and drops on my gravel bike, I occasionally brushed against the bag, but that was due to my own choice to use an extra-long dry bag.
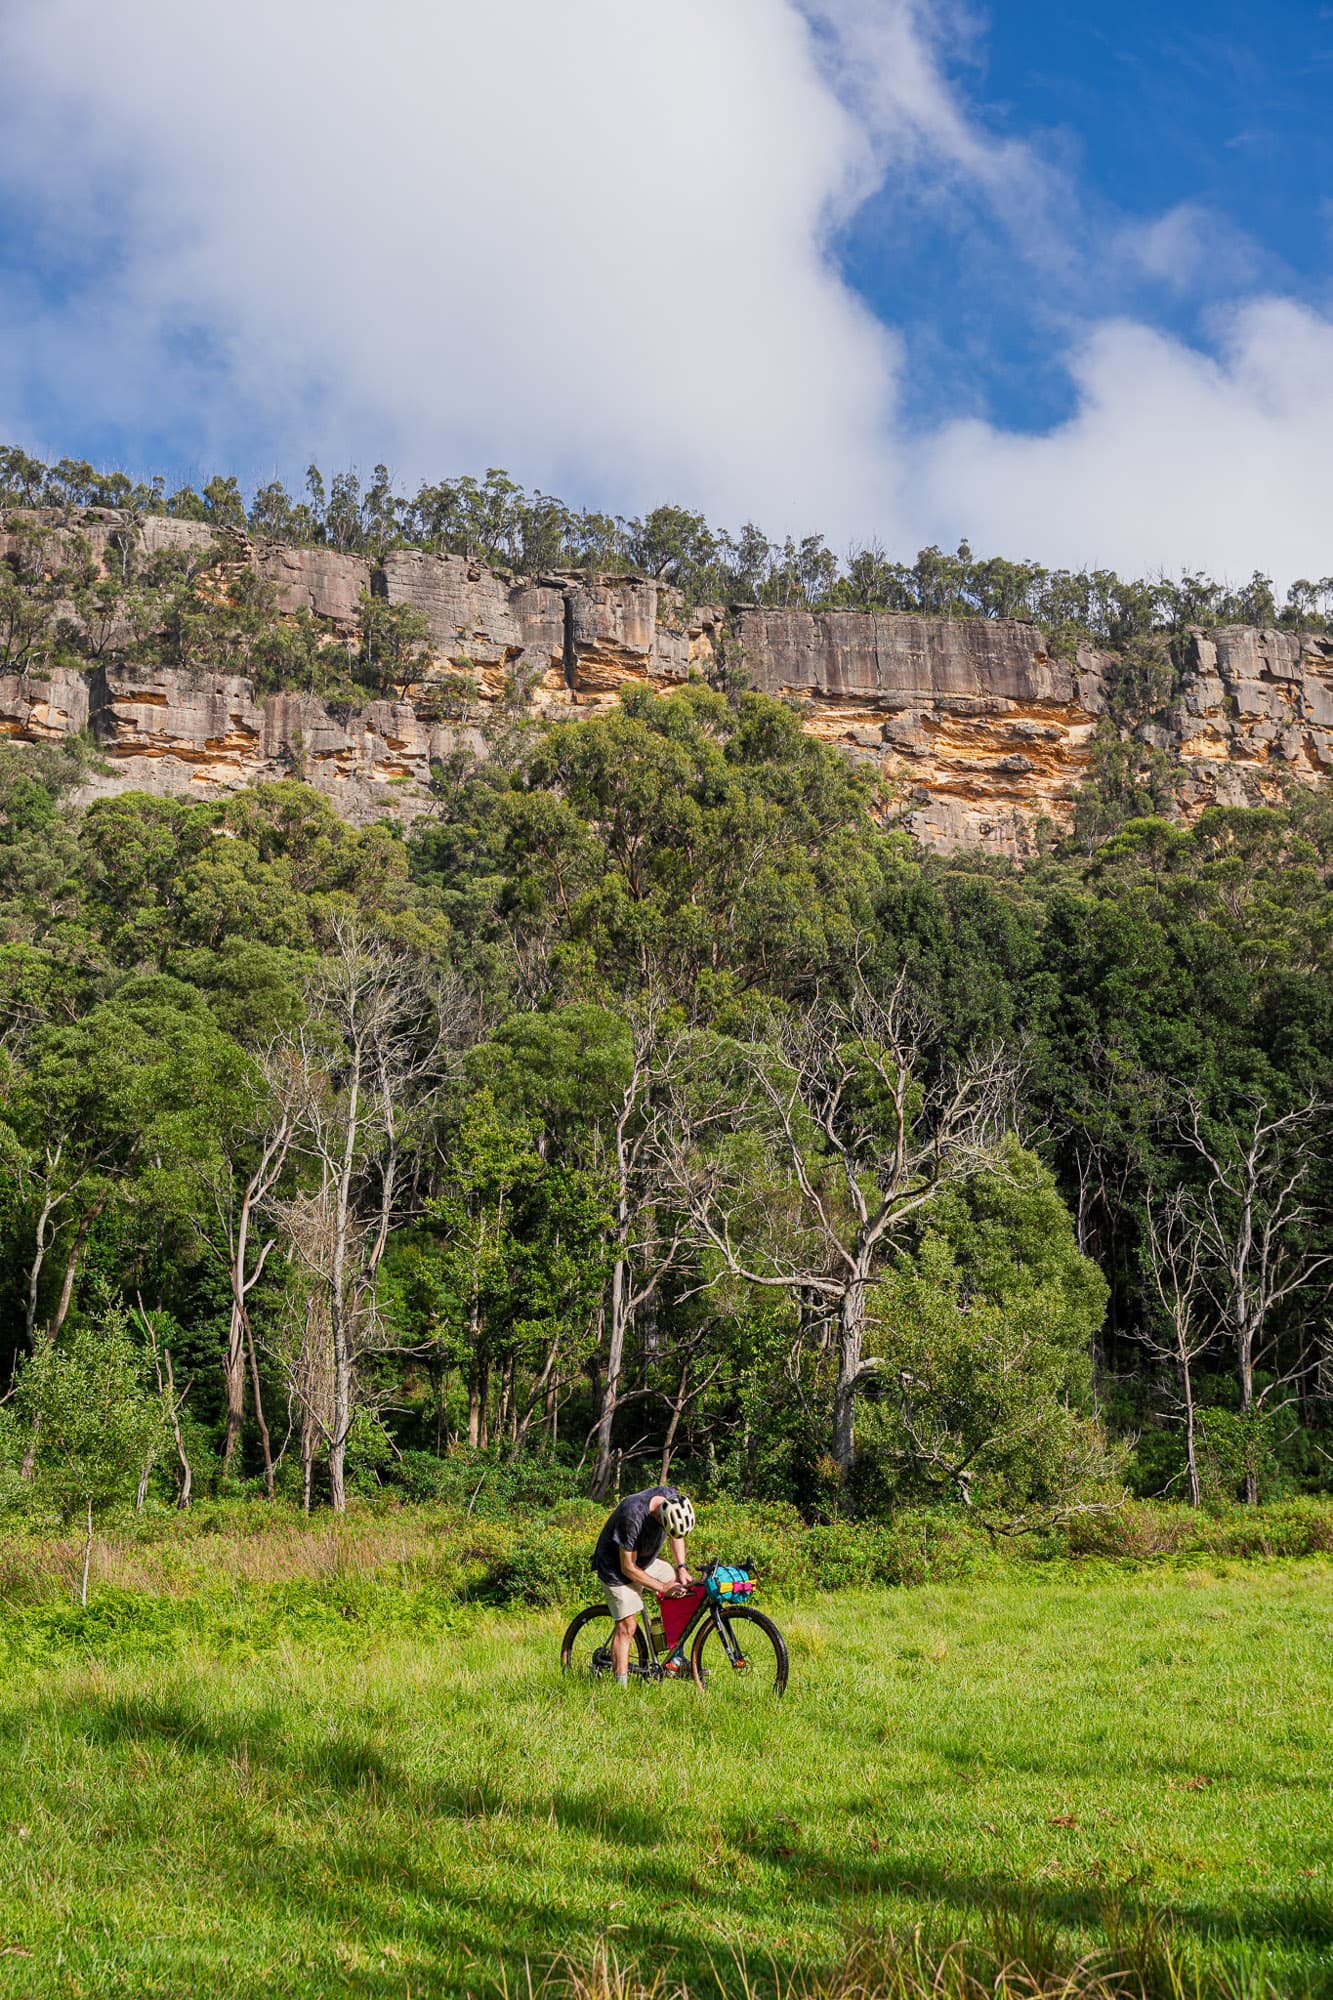
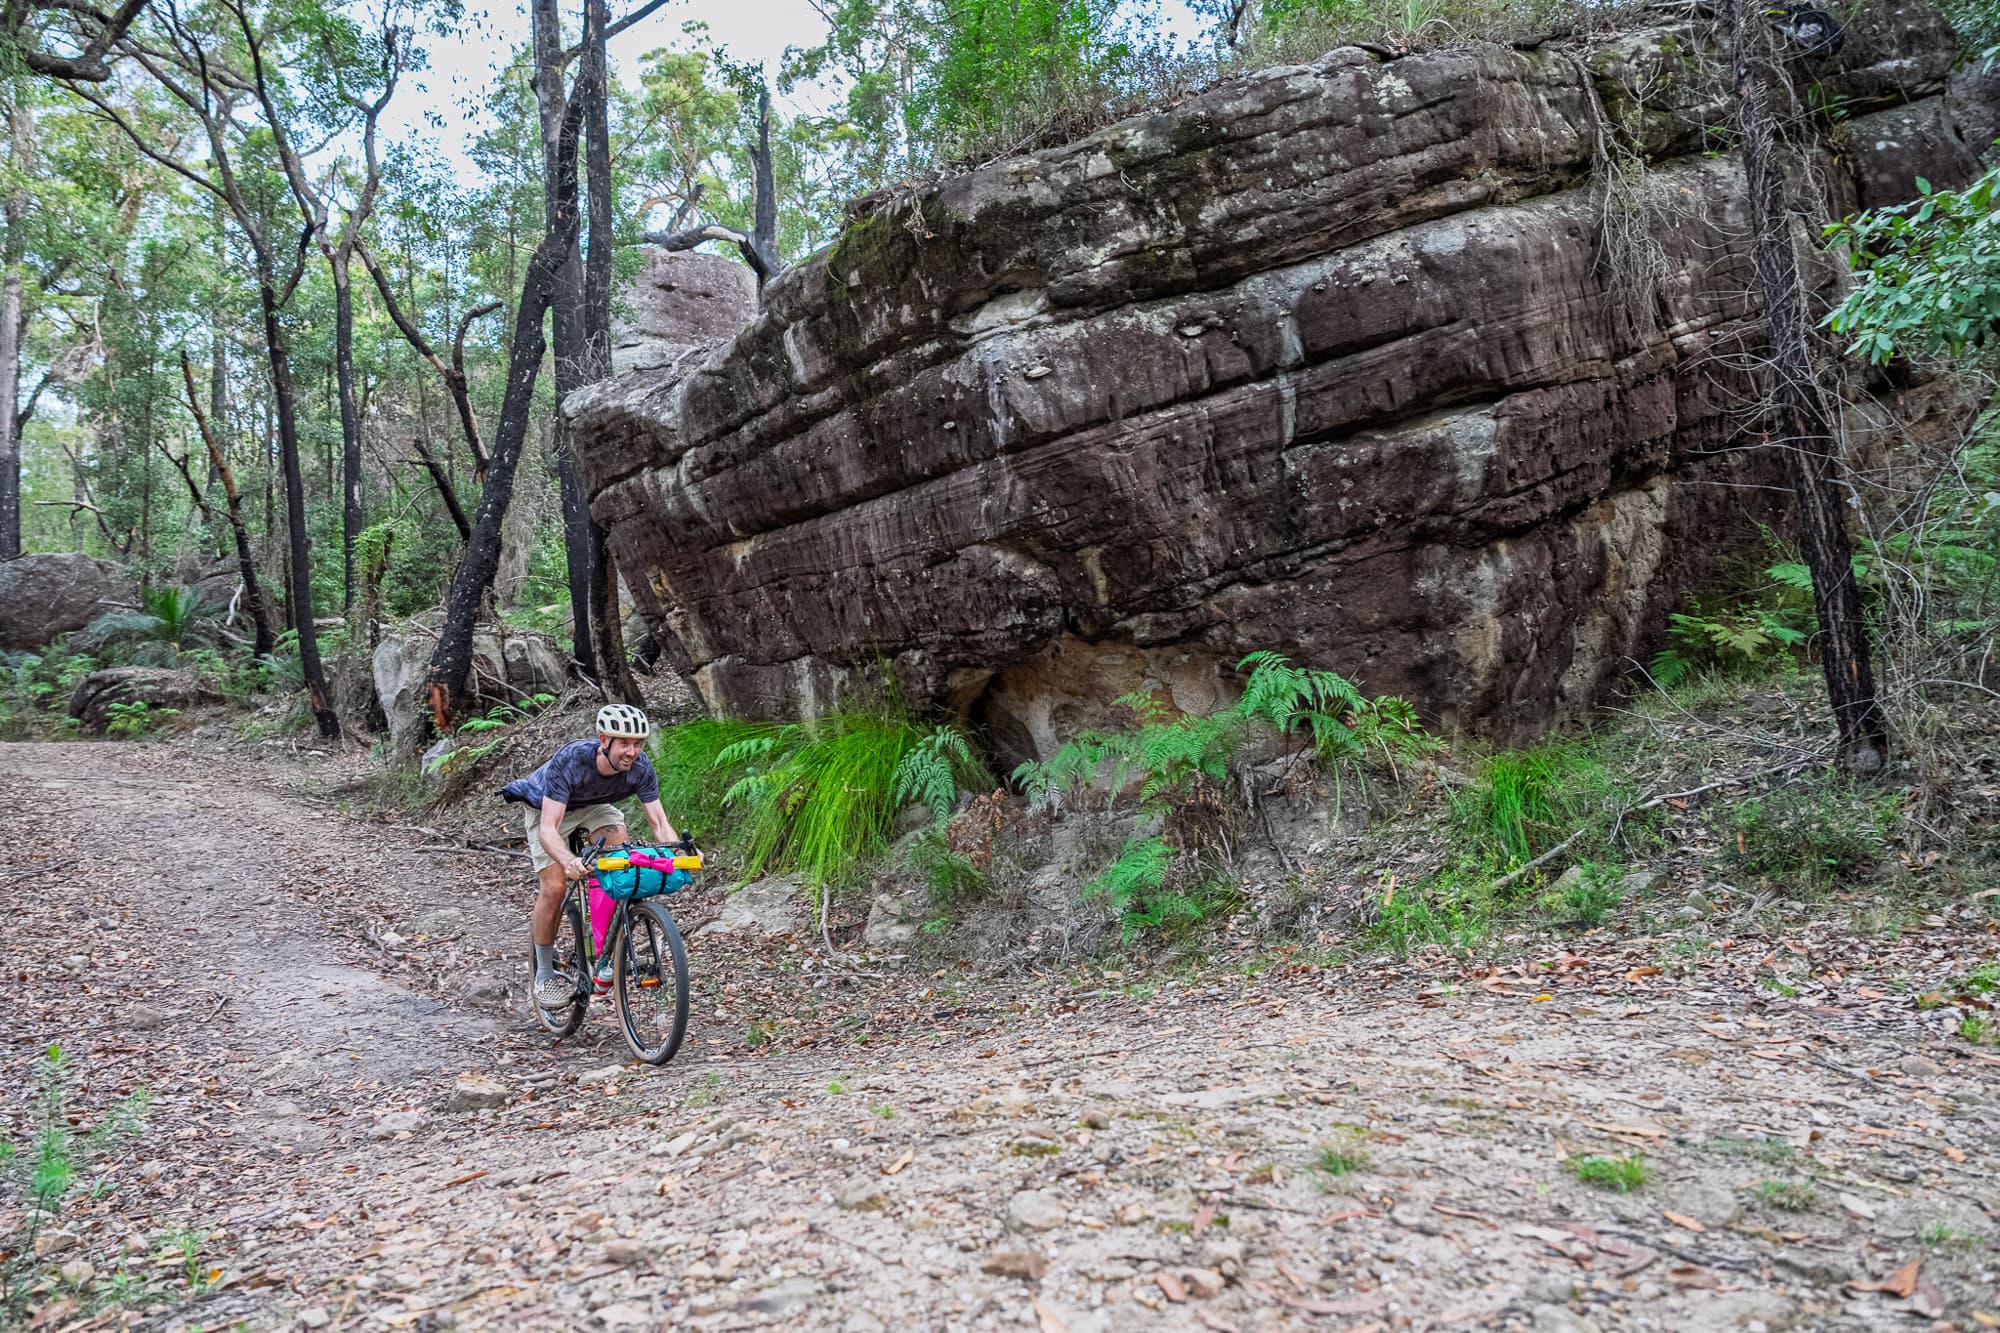
I used the harness bikepacking here in Australia and during a ten-day trip in New Zealand. I've found the harness is rock solid, but there are some aspects to consider when choosing a bag to strap on. The smaller the bag, the better the harness works. With a small dry bag up front, you can cinch it in nice and tight, it will fit between your bars, and will not budge, regardless of how bumpy the terrain is. However, as the bag increases in diameter, you might notice some wobbling within the straps. With this in mind, I tried a variety of bags until I found the perfect fit that combined a decent amount of carrying space, without exceeding that pre-wobble size limit. I've found that I can easily fit my lightweight sleep system up front—tent, mat and bag.

I've also found that softer items work best with the system as they can be cinched down tight within the straps. On occasion, I packed in tent poles, but found it a little harder to achieve optimum cinch when they were involved. I also think using a bag with webbing loops adds to a solid setup, preventing any lateral bag movement of the straps. Rogue Panda offers the chance to upgrade to Austere Mfg. Buckles and I often wished I'd paid for this $40 upgrade. The plastic buckles have withstood over 1000km of bikepacking without any issue, but I think I would have greater peace of mind with the Austere buckles. At camp, I appreciated how easy it is to remove my dry bag from the harness, likewise the ease of re-attachment the next day, as it's so much nicer unpacking and packing a bag away from your bike rather than stuffing/unstuffing my old bar bag while mounted to the bike.
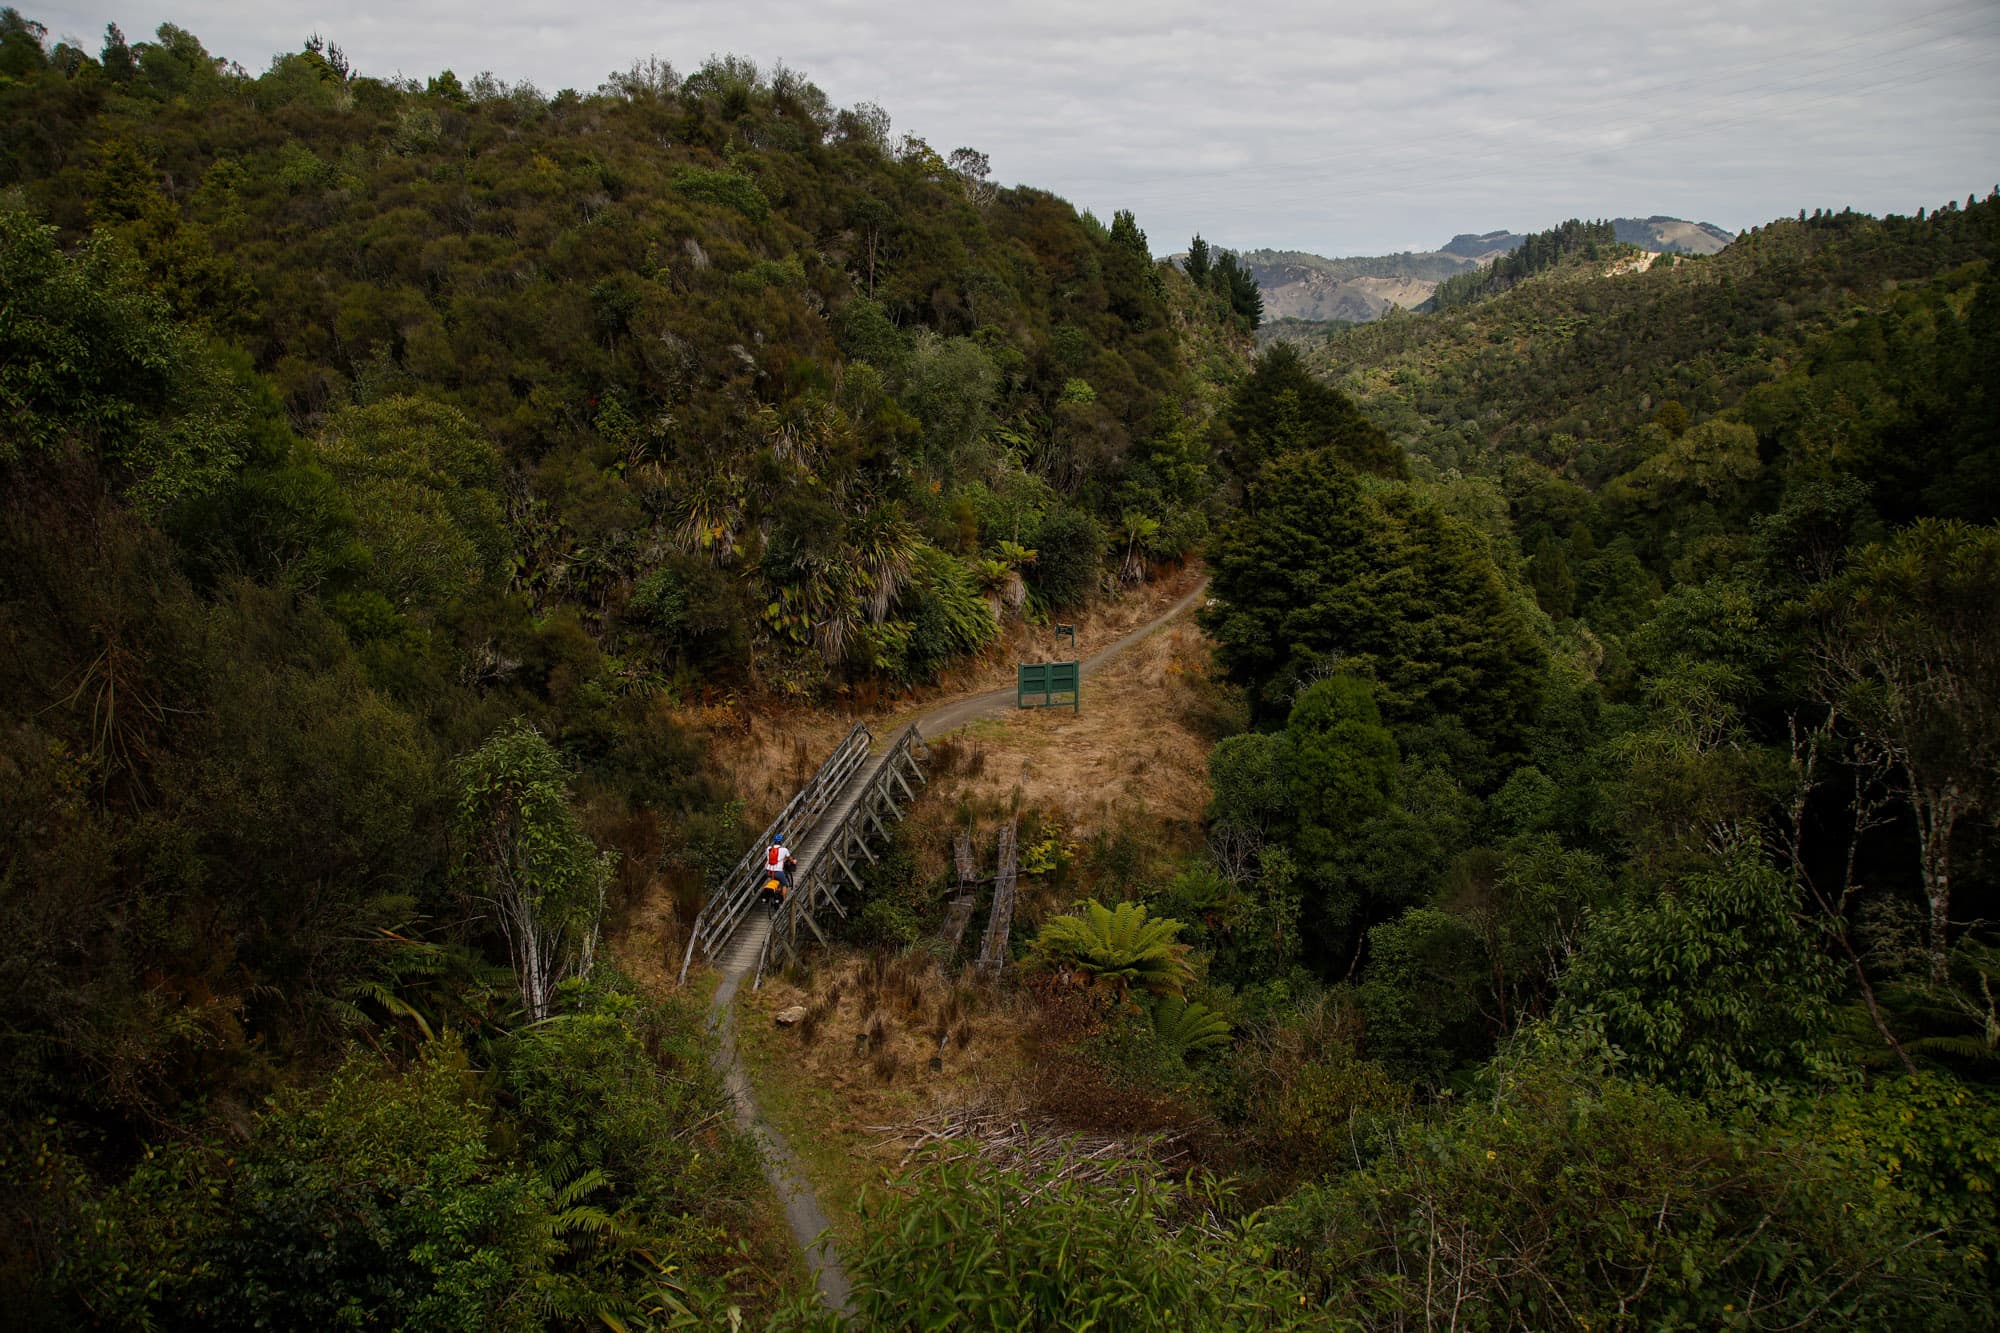
I mentioned earlier that Rogue Panda is built for the singletrack, and my New Zealand tour included plenty of trails, including an 85km long stretch called The Timber Trail. I enjoyed this section more than my riding buddy with his traditional pannier and handlebar roll setup as opposed to my seat pack and handlebar harness. I was whooping my way along the trail with my bags hugging the bike rather than his experience—bags bouncing around and threatening ejection at every turn.
One Word: Simple
It's always a risk taking a punt on a new product, especially one with a reasonably expensive price tag, but the Blue Ridge Handlebar Harness has lived up to and exceeded my expectations. Its simple installation means I can bolt it onto any of my bikes and use it for short jaunts around town or big bikepacking adventures. I certainly haven't treated it with kid gloves, and while I haven't experienced the rugged terrain of Arizona, I reckon the trails of Australia and New Zealand are similar alternative testing grounds. With over 1000km of carrying under its belt(s), I'm confident I'll get a lot more use out of this clever and simple piece of gear.
Pros
- Works with a wide range of handlebars and bike types
- Fast, straightforward installation
- Keeps gear secure and stable, even on rough singletrack
Cons
- Pricey at $200 USD for a minimalist setup