Once only used for getting low and into an aerodynamic position, aero bars are now being installed with tall risers and upward tilt to provide a restful neutral position for your arms and wrists, giving them a chance to rest on long bikepacking trips, while still offering the aerodynamic advantage of reducing frontal area when battling headwinds. They are great to use at the right time, but not always. For example, there is a small group I enjoy riding with after work, but as with some group rides, I'm not permitted to have aero bars installed. So, with my current setup, I have to take them off and pack all the little bits 'n' pieces into my tail bag—such an inconvenience. Once home, I have to put it all back on. Okay… installing them is a simple, straightforward bolt-on process, but setting the perfect position may take a little riding and tweaking. What if I could just quickly take them off when I don't want them and put them back instantly, set up the way I like them—how cool would that be? Enter, RedShift's convenient quick-release aero bars. No faffin' about with wrenches, loose bolts, or fiddling to get the perfect angle every time I put my bars back on.
Hundreds of studies have been written about optimal aerodynamic body position with aero bars and those who are looking for the ultimate speed advantage would frankly not be reading this review. I'm speaking to the occasional user who is seeking some comfort and speed in a conveniently removable package.


Going Aero
Before I get into the low-down of these bars, I want to urge those who have never used aero bars to remember that—like any cycling skill—it takes practice and proper technique to use them safely. First-time users should consider a mid-hight riser, angling the bars slightly upward, and beginning with elbow pads in a wide position. The narrower the elbows the more unstable the overall position. Your first ride should be on open roads with little-to-no traffic by yourself. It's easy to get into trouble if you don't learn to ride aero bars in progressive steps. Get comfortable by putting one elbow down and lightly resting your hand on the bar end. Then alternate and try the other elbow. Once you feel comfortable with that you're ready to put both down. Trust me, it will be a little unnerving a first, but eventually, you will begin to "feel" the bike move under you. It only takes a light touch as you guide the bike. Practice holding a straight line while doing things such as reaching back with one hand to tap the back of your saddle, reaching down to your water bottle, and performing smooth shoulder checks. You can learn to corner but just remember to do this in a safe area. Pay close attention to road conditions and anticipate upcoming hazards. Over time, you will gain confidence and may wish to most your elbows closer together, but don't overdo it. As a general rule, do not ride in an aero position in a group unless you really want to get a good old-fashion scolding.
Installation
Installing the RedShift Quick-Release Aero bars on a conventional 31.8 mm handlebar is pretty straightforward and the supplied instructions make the process clear. Shims are included for 26.0 mm bars. If you have carbon handlebars, it's important to check with the manufacturer to ensure they are suitable for clip-on aero bars. These requirements are quite standard for clip-on aero bars. Remember to use a bicycle torque wrench for proper tightness.


Redshift Design
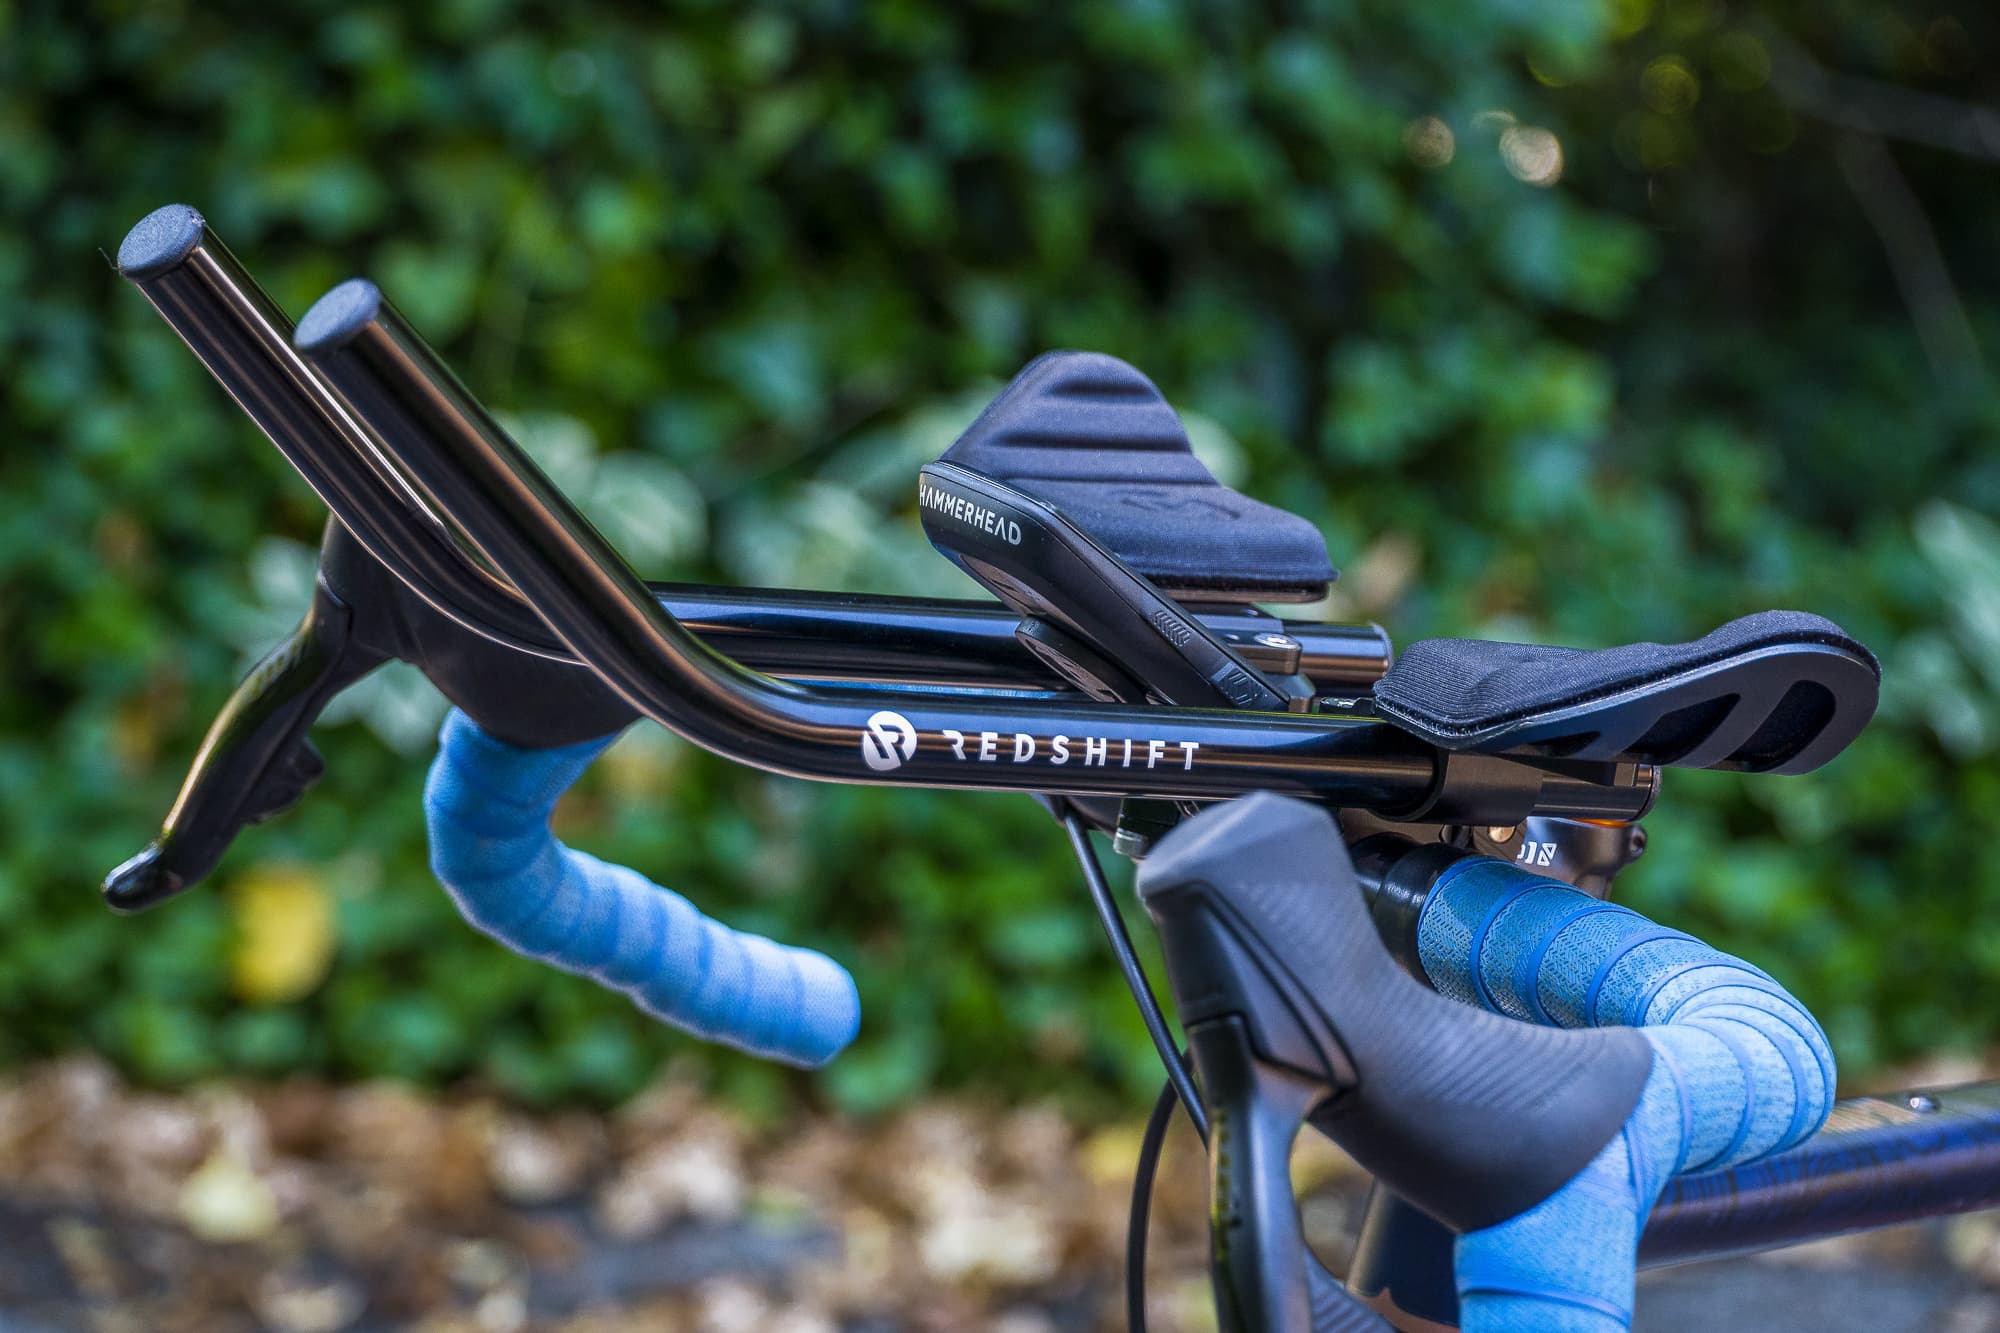
The RedShift Quick-Release aero bars come with two in two distinct styles of extension. The more aggressive "S" bend points the rider's thumbs forward and the gentle "L" bend offers a more relaxed wrist position. I opted for the relaxed style, as comfort is my top priority. The innovative design feature of these bars is that the mounting clamps stay attached to the handlebar allowing for complete installation or removal in a few seconds using clever spring-loaded rods that slide into a keyway. Tightening the quick-release levers prevents the rod from backing out of the keyway. I did find that the small bolt head on the quick-release could have been a knurled knob instead, just like on the 9mm wheel QR skewers. Upon inspection of the parts, I realized there was play in the quick-release system and expected this play to be there still once installed, however once the QR bolt is tightened, the play completely disappears.


RedShift advertised specs say the "L" and "S" bend shapes weigh 640 grams and 630 grams. My complete set weighed 15 grams heavier at 655 grams for the "L" bend shape. I cut the extensions down for fit, trimming 20 grams from the weight. Compared to my current Profile Design 35A bars at 560 grams, the 75-gram penalty is a reasonable trade-off for the convenient quick-release functionality.
Adjustability & Comfort
The elbow pad mounting design offers a good range of elbow pad width adjustments with a minimum distance of about 120 mm (center-center) depending on your stem. If you like a wide setup that goes beyond the outermost mounting holes, move the mounting clamps farther apart on your bar. The maximum (center) position of the arm pads is 35 mm behind the bars to 15 mm in front which is a reasonable amount. RedShift has not overlooked one minor feature I have found missing on a few name-brand aero bars in the past. The ability to rotate the elbow rests a few degrees by using one round mounting hole and one curved slot. When not using risers the elbow pad platforms are 34 mm above the top of the handlebar (often referred to as "stack height"). 15/30 mm riser kits are available for $19.99 USD. In comparison, I have 50 mm spacers on my bikepacking aero bars to ease back and neck pain and allow access to my feed bags while riding. When it comes to comfort, the elbow pads measure 90 mm front to back and 115 mm wide with 15 mm of padding. The padding is of good quality and shape making long rides enjoyable. Replacement pads are available for $29.99 USD.

Redshift offers a few accessories for their aero bars, such as a water bottle mounting system for $59.99 USD, a computer mount for $29.99 USD, the 15/30 mm riser kit for $19.99 USD, and replacement arm pads at $29.99 USD.
Mounting Stuff
I tried using the nose bridge from my current aero bars, but once the RedShift extensions are joined in any way, it prevents the quick-release mounts from sliding off — it was worth a try — however, any accessories that mount directly to one of the 22.2 mm extension arms would work. This brings me to the problem of mounting my cycling computer. Since the whole idea of having the quick-release aero bars is to remove them, having any accessories mounted to the RedShift parts wouldn't make sense. I had to use my Easton stem front extension to mount my Hammerhead Karoo2, which had to be tilted up quite a bit to get the clearance to make the 1/4-turn when attaching. It's not a pleasing sight once the aero bars are removed — without tools — after which I'm compelled to grab a wrench and reposition my GPS unit flat. Is it my OCD or would you do the same? A stem-cap mount could work well if you don't have a top tube bag. A little bit of a dilemma to solve.


Since the extensions are a standard 22.2 mm size you could slide your favorite shaped carbon extensions right into the Redshift quick-release mounts to reduce the weight even more. There are several inexpensive computer mounts available made for aero bars.
Wrapping Up
Without question, the selling feature is the unique quick-release functionality which works quite well, however, I did wish that — just like a wheel skewer — the non-lever side had an easy nob to turn, rather than a small bolt head. The $180 USD price is very reasonable for the versatile functionality and build quality. RedShift has solved the problem of me removing my aero bars if I want to head out on my local group ride or go rip up some trails on the way home with the parts neatly packed away in my tail bag. Knowing that when I clip them back on, they'll be positioned exactly where I left them. However, if you tend to ride aero a lot on a specific bike setup, these bars might not be for you. Then there's the dilemma of what to do with your GPS computer or lights in a system that's designed to be tool-less. If you are a small rider who needs narrow drop bars, the quick-release mounts will likely take up the only space you have left between your bar tape and stem.
It's worth noting that RedShift markets these bars as part of their Switch Aero System, which also includes the RedShift Dual-Position Seatpost for $199.99 USD, which allows the saddle to be moved forward 5 cm while riding, thereby putting the body into the "power position" when down in the aero bars.

Pros
- Quick, easy attachment and release. No tools are required
- Available in two classic aero bar shapes
- Other 22.2 mm extensions can be used if desired
- Various inexpensive 22.2mm aero-bar accessories can be found online
- Additional weight is acceptable given the quick-release feature
Cons
- Where to mount your GPS or cycling computer on a system that is meant to be removed with no tools
- The mounting brackets left on your bars may take up any extra room if you use narrow drop bars
- No ability to remove the quick-release system if you install any type of accessory that connects the two extensions together.